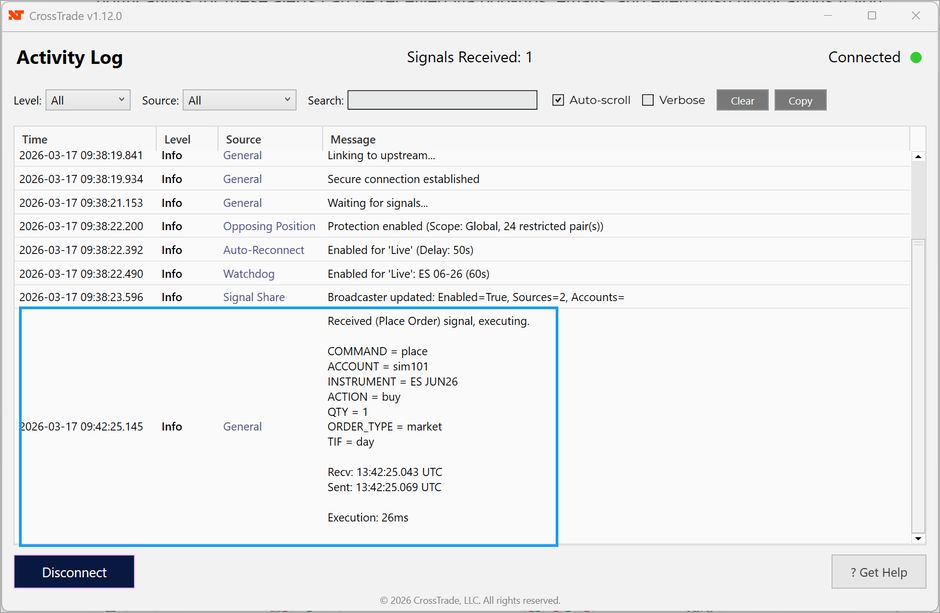
TradingView Alerts
An alert with no destination line routes to NinjaTrader 8. To reach a linked Tradovate account, the payload needs destination=tradovate;, or the Send to Tradovate checkbox if you are using the XT Alert Builder. Your First Automated Trade on Tradovate walks it through.
Creating TradingView Alerts with Webhooks
Include only the instructions CrossTrade needs for the selected destination. NinjaTrader is the default webhook route; add destination=tradovate; to execute directly through a linked Tradovate account.
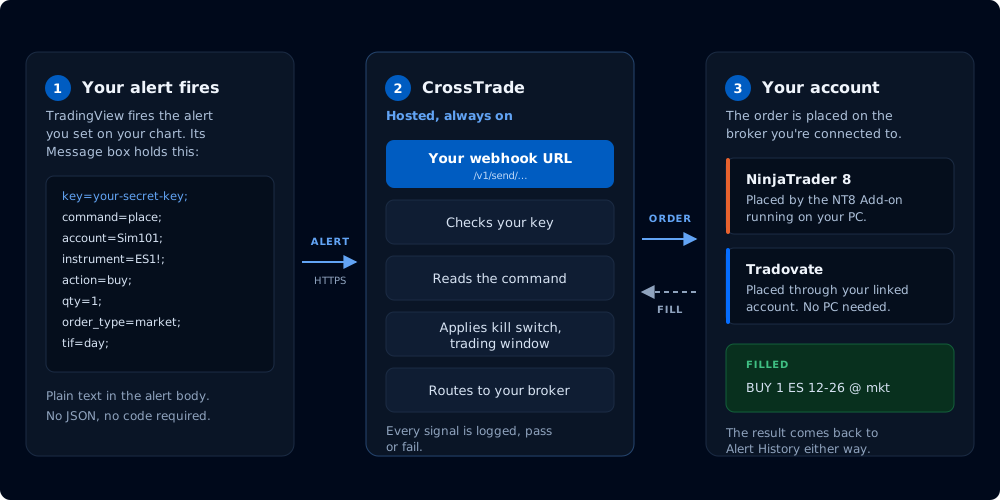
Where your alert message goes once TradingView sends it
TradingView alerts are held on their servers and will continue to operate even if you are not logged in.
An assistant can do every step on this page for you. See Automate with an AI Assistant.
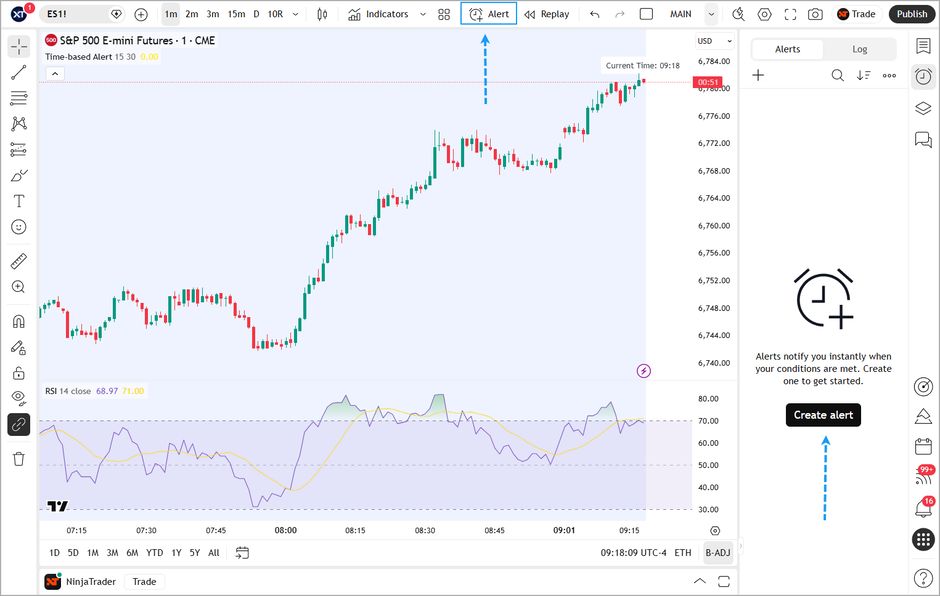
Step 1 - Open Alert Window
Inside your Supercharts, click to open an Alert window from the top or right navigation clock button.
Step 2 - Determine your Alert Conditions
To set up an alert, you can utilize various trigger conditions and decide whether the alert should fire once or repeatedly until you disable it. You can customize the Expiration date of the alert and provide a name to keep your alerts organized.
If you intend to automate from an Indicator or Strategy, you will link your alert to the trigger Condition from that indicator or strategy.
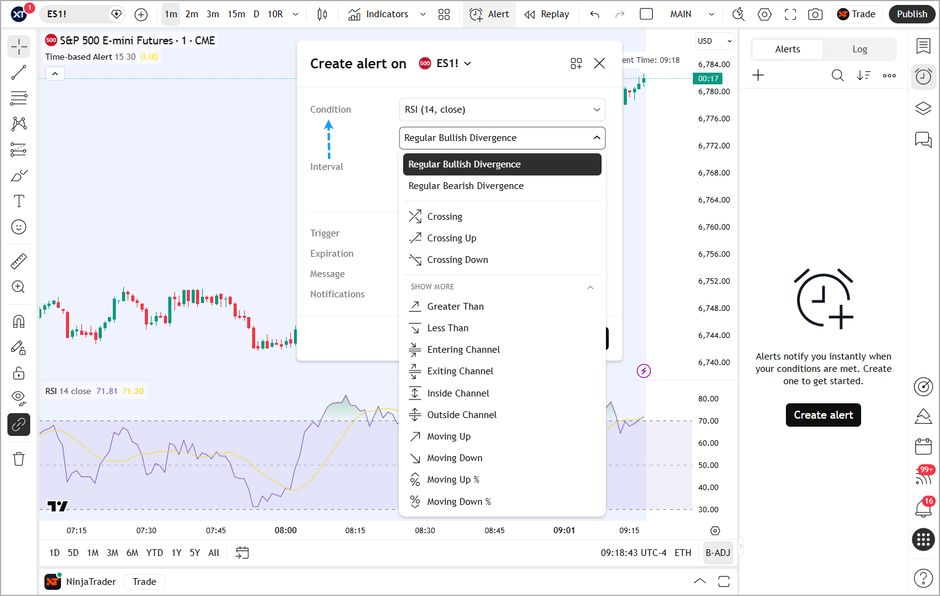
If your indicator has specific buy and sell conditions, you will see those in the drop down like this standard RSI indicator offers, Regular Bullish Divergence and Regular Bearish Divergence signals.
If your indicator does not have a condition you can use to reliably trigger the alert, its incompatible.
If you're triggering alerts from a Renko, Range, Line Break, Kagi, or Point & Figure chart, your alert can fire well after the underlying market move. New Renko bricks only print once price has traveled the full box size, so the bar's close value reflects the synthetic brick close, not the live market price at the moment the alert fires.
CrossTrade's free TRUE OHLC indicator overlays real-time time-based OHLC values onto your Renko chart, so you can read and reference accurate price data even while charting on non-time bars. It's available in the TradingView Tools section of your CrossTrade account.
Step 3 - Provide payload information
In the message field you will supply the payload information you want CrossTrade to route to NinjaTrader or Tradovate. Leave out destination for the default NT8 route, or add destination=tradovate; for direct cloud execution.
The examples below use semicolon commands. You can also send a flat CrossTrade JSON object in the same Message field, using "destination": "tradovate" for direct Tradovate routing. See Webhook Trading for JSON examples with TradingView placeholders.
Remove any default text that may be in that message window when you first load your Indicator or Strategy. You only want to provide the CrossTrade payload.
For example: Bot V3 (, , , , , , , , , , , , , , , , hlc3, 5, 2, 2.8, 3, 3, 5, 5, 5, 5, NORMAL, 0.75, 0.75, 25, 3, 2, NORMAL, 3, 3, 4, 4, 9, 5, 1, 1.2, 59, 43, 1.55, 23, 2.4, 6.2, CLASSIC, 9, 19, 0.7, 0.25, 0.6, 5, 19, MAC-Z, 6, 67, 25, 17, 2, 0.6, 61, 80, 20, 80, 20, 50, 14, 30, 15, 30, 0.75, 10,000, Small): order {{strategy.order.action}} @ {{strategy.order.contracts}} filled on {{ticker}}. New strategy position is {{strategy.position_size}}
All of that needs to be removed.
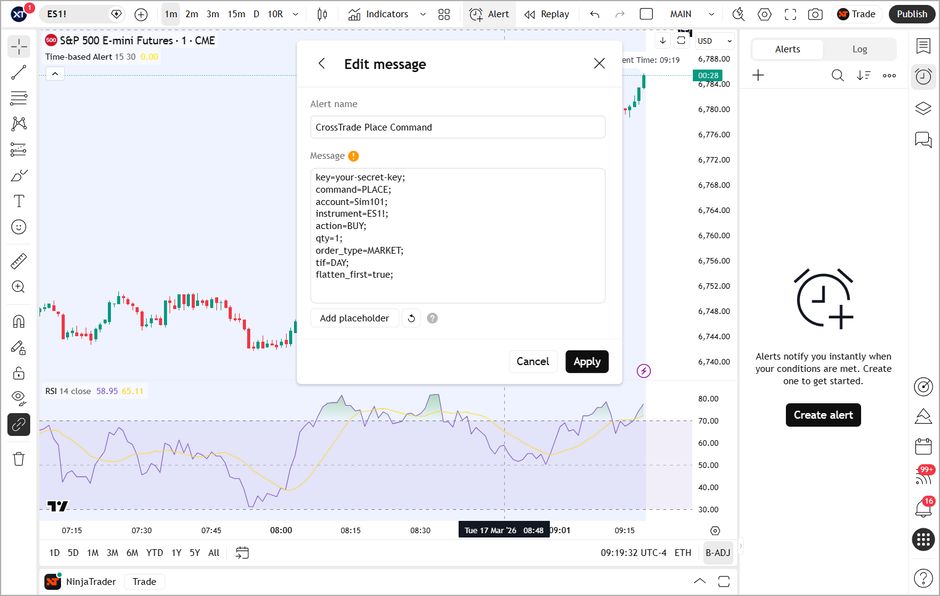
ONLY CrossTrade compatible information can be inside the message window. Any non-compatible text will cause the alert to fail.
Basic alert for Indicator entries
In this example, we are using a basic PLACE command for a Buy order.
key=your-secret-key;
command=place;
account=Sim101;
instrument=ES1!;
action=buy;
qty=1;
order_type=market;
tif=day;
flatten_first=true;
Basic alert for strategy entries
In this example, we are using the strategy variables to supply the Action and the Qty to your alert dynamically, based on the settings of the strategy.
key=your-secret-key;
command=place;
account=Sim101;
instrument=ES1!;
action={{strategy.order.action}};
qty={{strategy.order.contracts}};
order_type=market;
tif=day;
There are many different command types for various automation scenarios. You will find more examples in the Commands and Advanced Options sections of the docs as well as in the Command Examples section of your Webhooks dashboard.
Step 4 - Add Webhook URL
From the Notifications tab of the alert window, you will need to provide your specific CrossTrade webhook URL. The URL can be found on your My Account page or on the CrossTrade web Dashboard below the Webhook Trader.
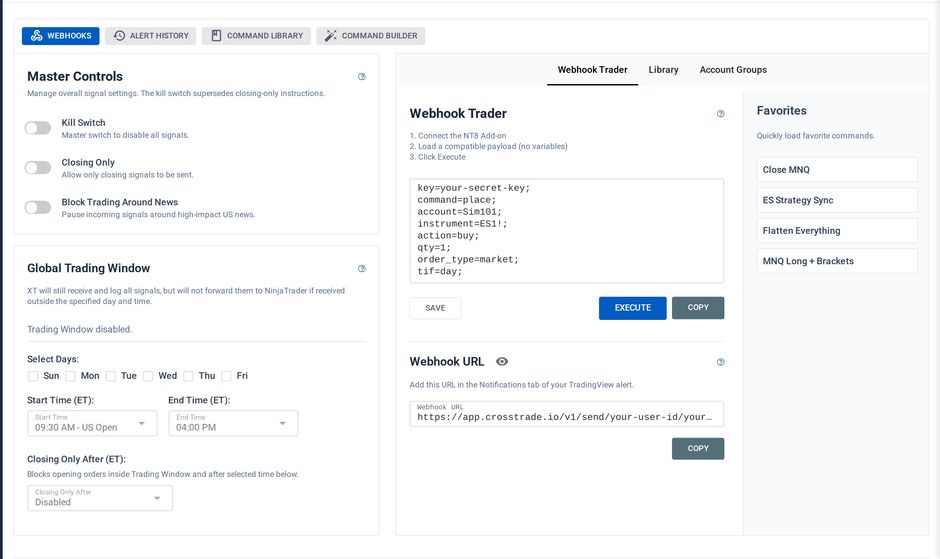
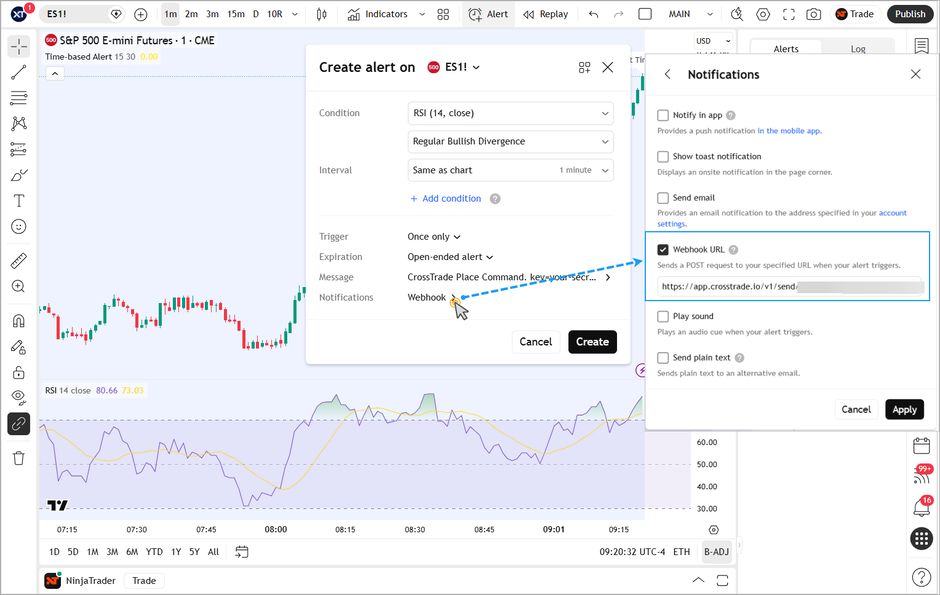
Webhooks require 2FA to be enabled on your TradingView account. If you have not used webhooks before, you will see this prompt
.webp?alt=media&token=514dc1de-303e-40da-b8a7-ceb34fe5e55a)
Once enabled, you can add the webhook URL into the field and save the alert
Step 5 - Managing Alerts
Edit, clone or delete alerts from the alert manager. Click the clock icon on the right of the chart to open it and review triggered alerts.
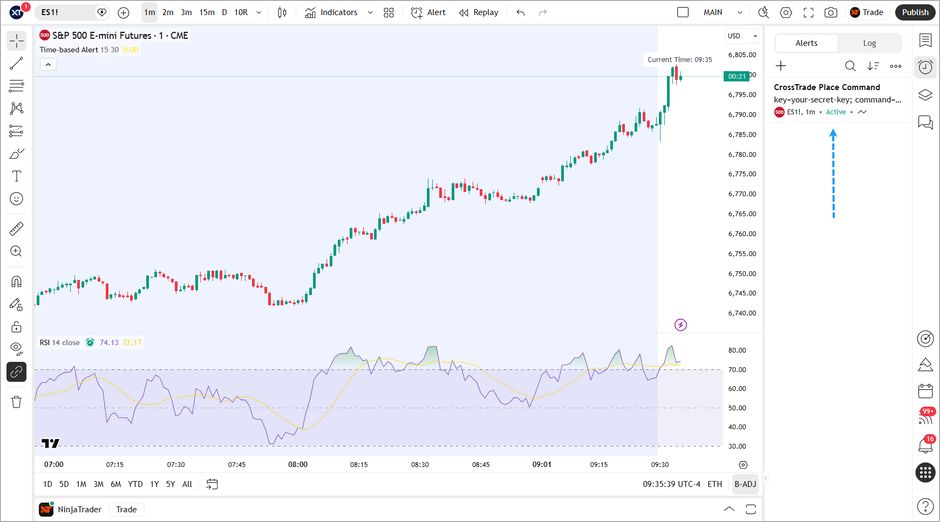
Once you start sending alerts from TradingView to CrossTrade, you can review your recent alert history on the CrossTrade Alert History page. For NinjaTrader alerts, the CrossTrade NT8 Add-On also records each request it receives.