VPS Connection Guide
How to connect to your CrossTrade VPS from Windows, iOS, or Android.
Direct Connect Instructions
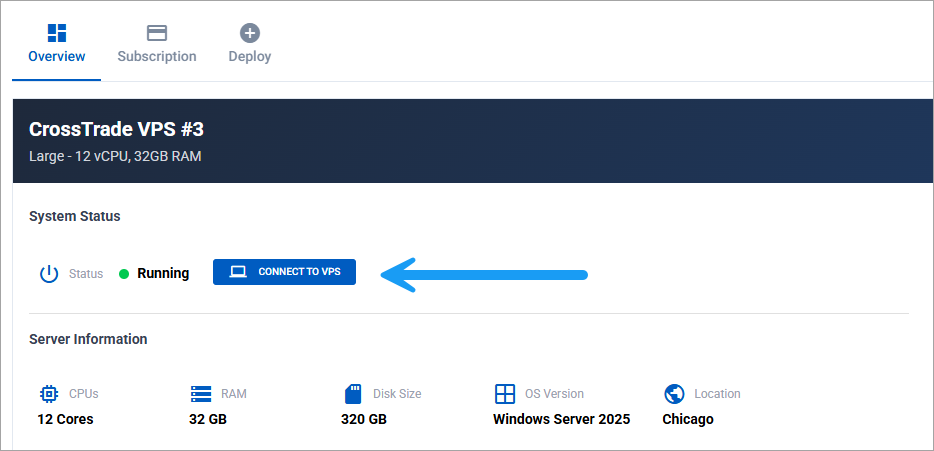
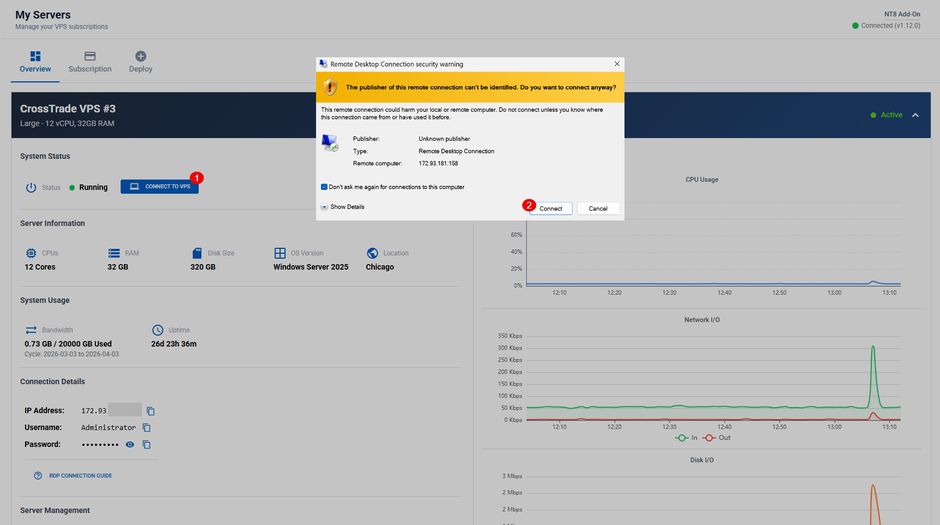
The Connect to VPS button on the VPS page downloads an RDP file.
If you click on the downloaded file, you will likely see a browser security warning. Agree that the download is from a trusted source and then connect.
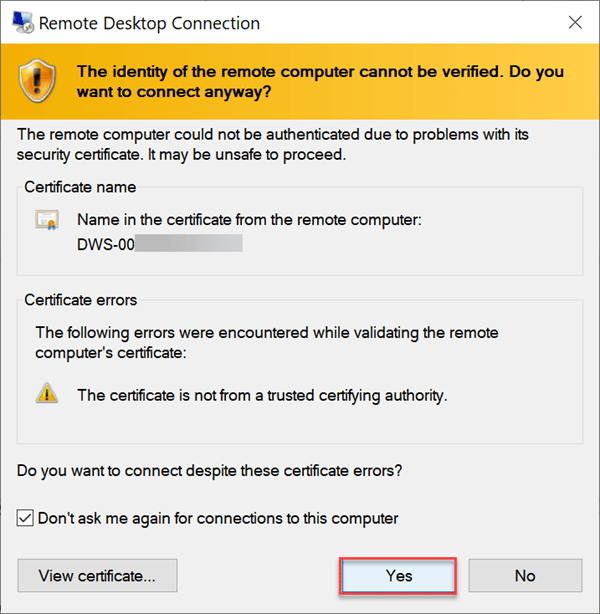
Check the box for 'Don't ask me again for connections to this computer'
Once this is connected and in place, you can directly access your VPS without needing to use your PC's Remote Desktop Connection.
Non-Direct Instructions
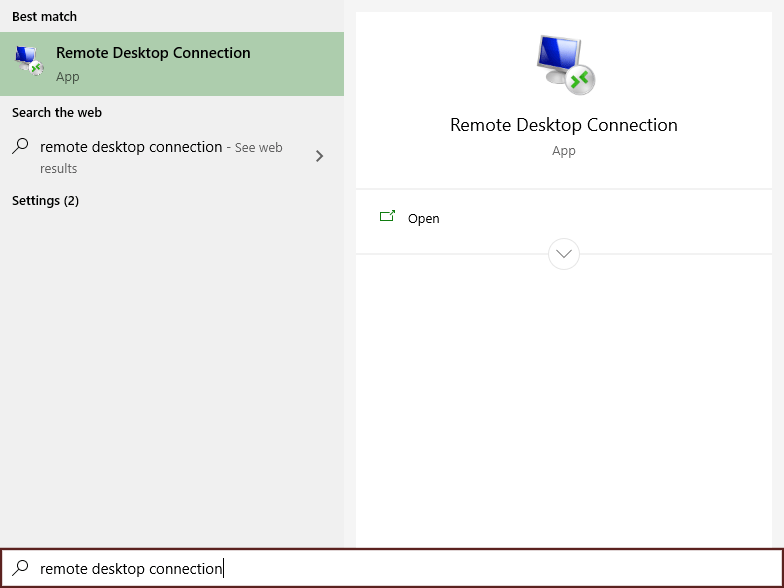
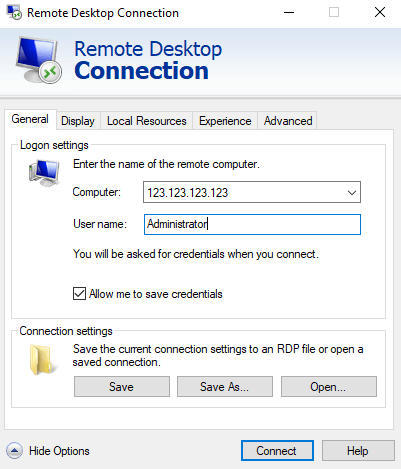
Step 1. Windows comes with a built-in app for remote connections. To open it, click Start, type “Remote Desktop Connection” in the search bar, and select it from the results.
Step 2. Under Computer enter your IP Address that is found in the Control Panel.
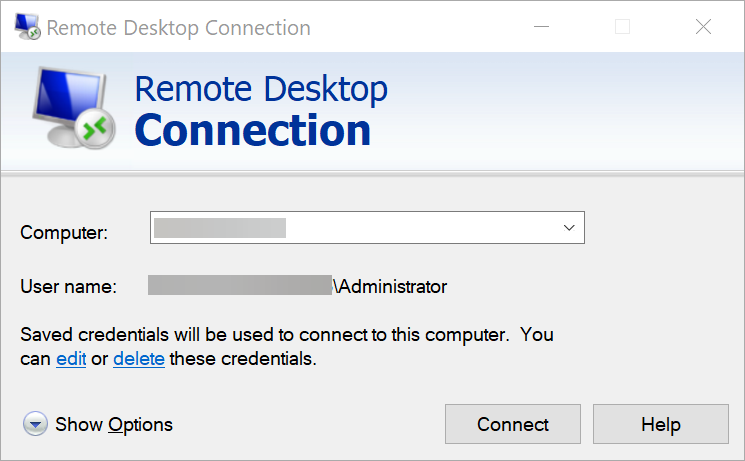
Step 3. Click Show Options
Step 4. Under User name enter the username that is found in the Control Panel.
Where to find VPS Login info
- Login to your CrossTrade VPS account via https://app.crosstrade.io/user/vps
- From Overview, Scroll down to "Connection Details". Additionally, the connection details are emailed to you upon purchase.
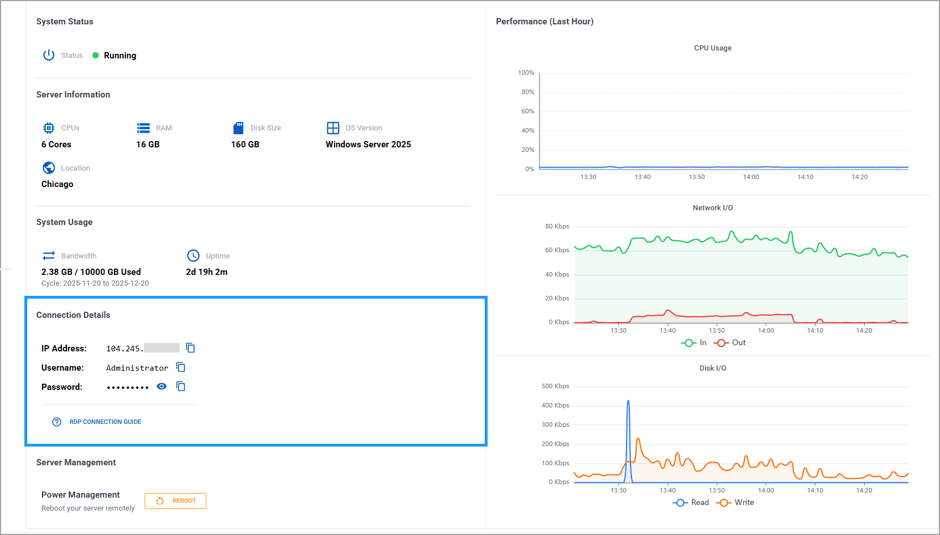
3. Click on the IP Address, Username, and Password copy buttons📄and then add them to your RDP connection
Step 5. Optionally, check the “Allow me to save credentials” box to save your login details and avoid re-entering the password for future connections.
Step 6. Click “Connect.”
You may get prompted about an unknown certificate if your computer has never connected before– click yes to proceed.
Step 7. Enter the server password provided in the email
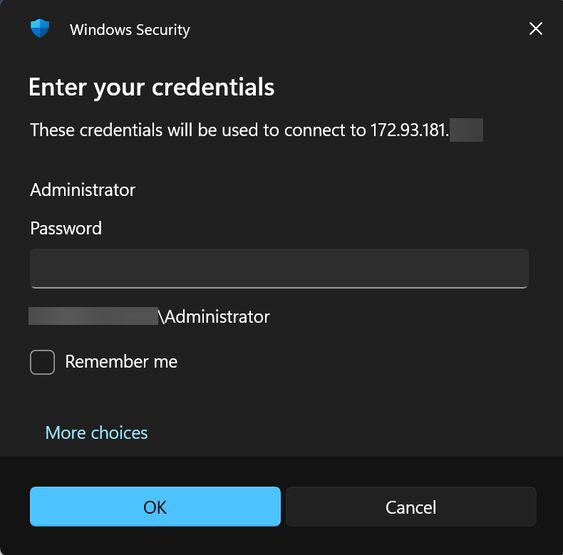
Step 8. If you skipped step 5, you can save the credentials now by checking “Remember Me.” If you selected the option earlier, “Remember Me” will already be preselected.
Last step. Click OK to connect to the server.
The desktop comes with NinjaTrader 8 and the CrossTrade NT8 Add-On preinstalled.
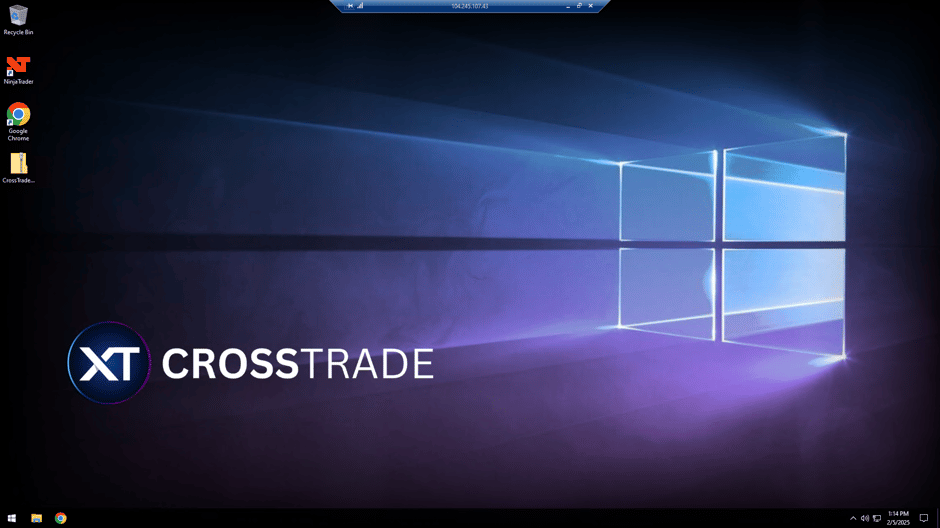
Changing Default Password
The password you see on the dashboard is just the default we provide so you can get access. You can change it on the VPS as you would any other Windows machine.
Windows button > Search > change password
.webp?alt=media&token=470d3048-a0a2-44d6-bcb4-8fc237ba57d9)
Connecting via Mobile App
- On your Android or IOS device, navigate to the Google Play or Apple App Store and download the Windows App by Microsoft.
https://play.google.com/store/apps/details?id=com.microsoft.rdc.androidx
https://apps.apple.com/app/windows-app/id714464092
- Once downloaded and open, click PC Connection
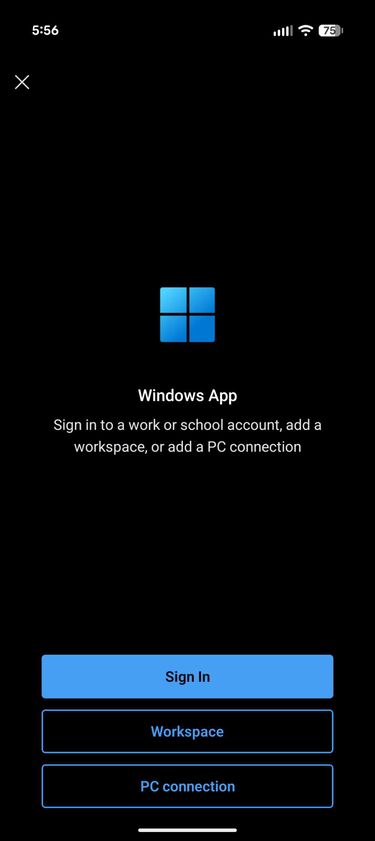
- Add your VPS IP Address at the top under PC Name.
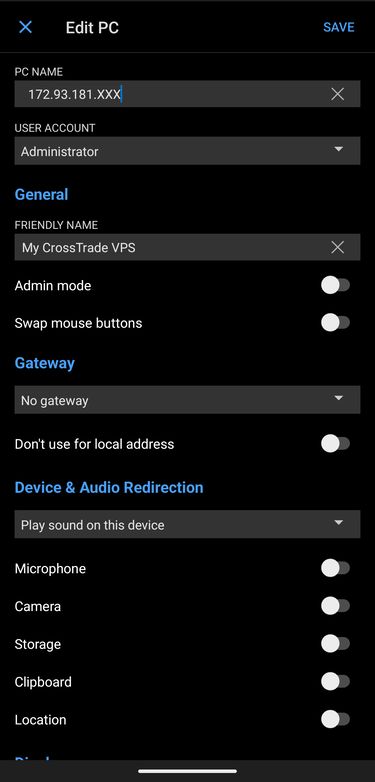
- Under User Account click Add User Account.
Username: Administrator
Password: (your VPS password)
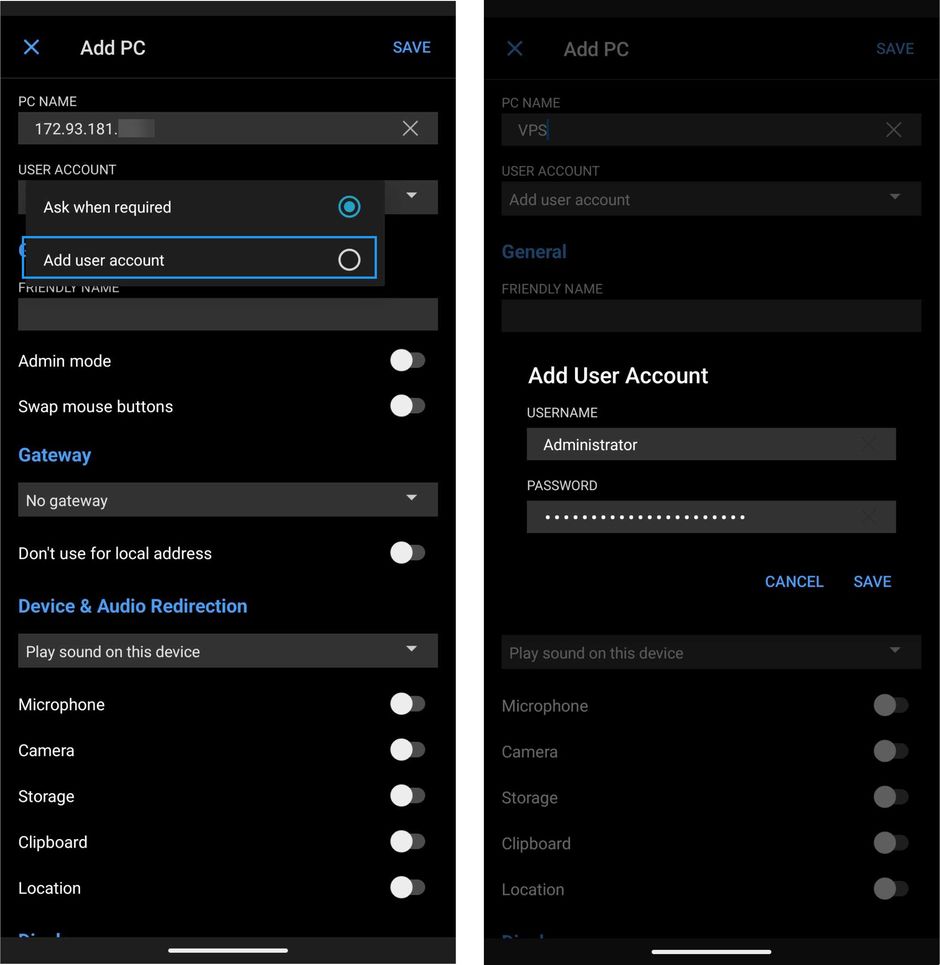
Optional - Provide a Friendly Name for organizational purposes (e.g. My CrossTrade VPS)
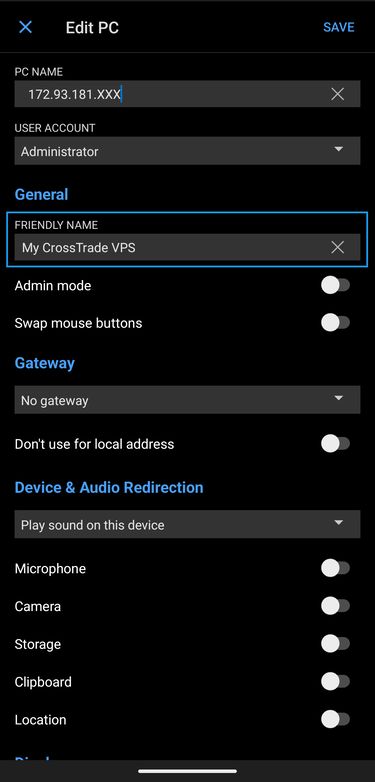
- Click Save.
- On the Certificate screen, you can check the box for 'Never ask again for connections to this PC' if you would prefer to circumvent the login process moving forward.
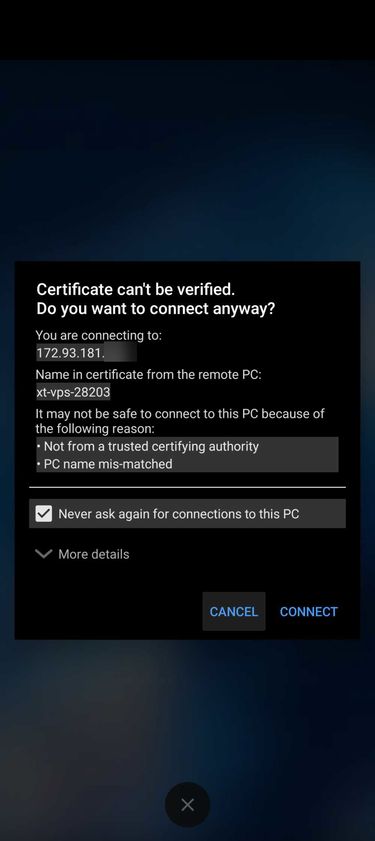
Click Connect to reach your VPS from the mobile device.
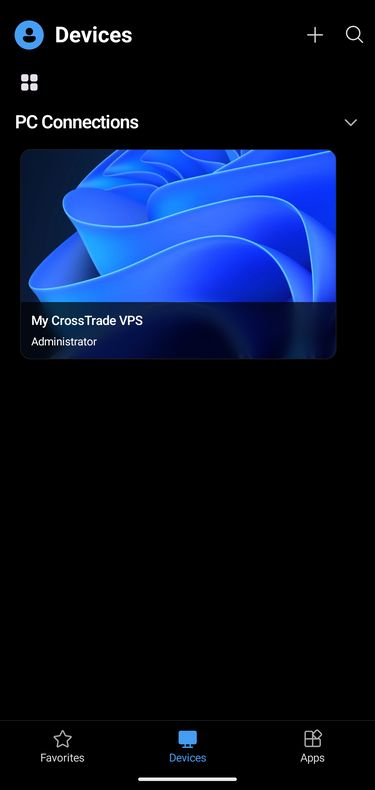
Troubleshooting Connection Issues
If you cannot connect, confirm Remote Desktop is enabled on the VPS, then re-check the IP address and credentials on your VPS page.
For more information, you can refer to Microsoft's official documentation on getting started with the Windows App
Migrating to a New VPS
Switching to a new Windows VPS (a new server, a different provider, or an upgraded plan) does not carry your NinjaTrader setup with it automatically. This section covers moving everything that matters: your workspaces, chart templates, ATM strategies, historical data, and your CrossTrade NT8 Add-On login.
Set aside about 20 to 30 minutes, and do the move while the market is closed.
If you migrate during a live session, an order or automation can fire from the old server and the new one at the same time. Always move over a weekend or outside session hours, and confirm the old VPS is fully shut down before you trade on the new one.
What you are moving
Almost everything NinjaTrader knows about your setup lives in a single folder on the VPS:
Documents\NinjaTrader 8\
Inside it:
workspaces\— your saved chart and window layoutstemplates\— chart, indicator, ATM strategy, and order templatesdb\— the NinjaTrader database: instruments, historical data, and trade historybin\Custom\— custom indicators and strategies (NinjaScript), including the CrossTrade NT8 Add-On
The backup in Step 1 packages those folders for you, so your whole trading environment moves in a single file.
Every CrossTrade VPS ships with NinjaTrader 8 and the CrossTrade NT8 Add-On already installed. If your new server is a CrossTrade VPS, you can skip the install step and focus on moving your NinjaTrader 8 folder and logging back in.
Step 1. Back up your setup on the old VPS
NinjaTrader has a built-in backup that packages your whole setup into a single file. In the Control Center, go to Tools > Export > Backup File.
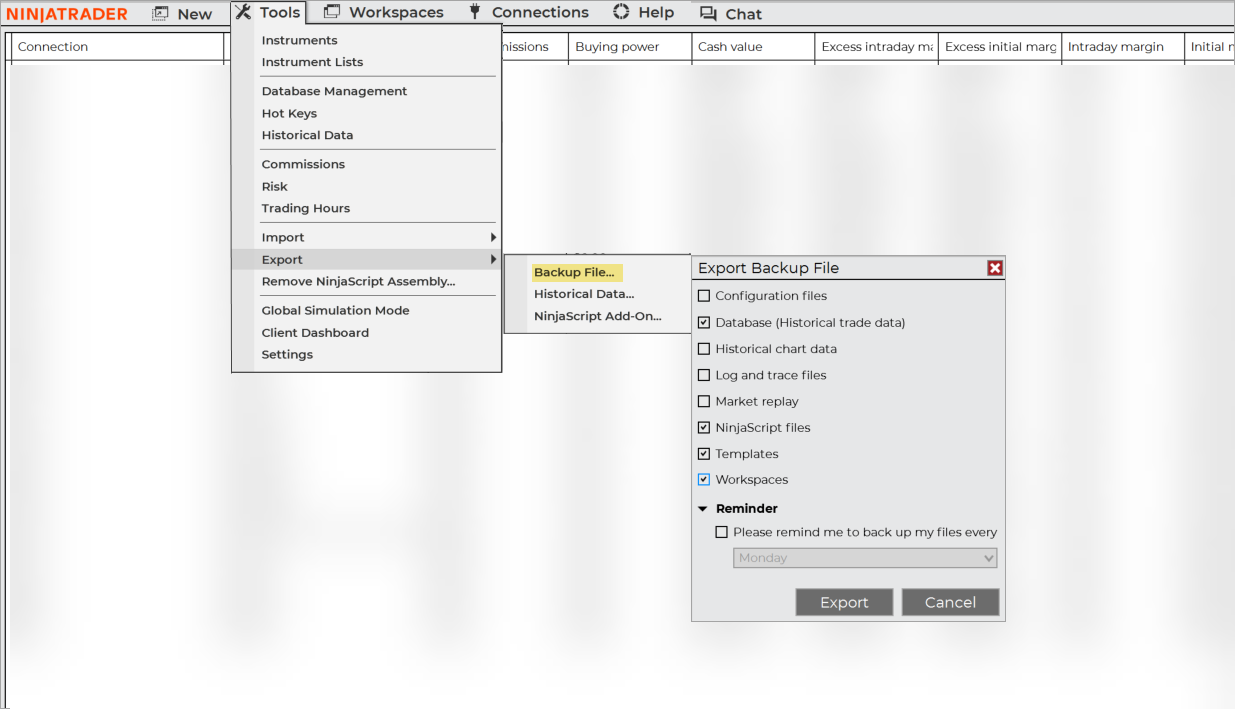
In the Export Backup File window, leave the default boxes checked (Database, NinjaScript files, Templates, and Workspaces) and also check Configuration files so your settings and connections come along. You can leave Historical chart data unchecked, since it is large and re-downloads on its own. Click Export and save the backup file somewhere easy to find.
You can skip the backup tool and simply zip the whole Documents\NinjaTrader 8 folder in File Explorer instead. If you go this route, fully exit NinjaTrader first (File > Exit) so the database is not locked while it copies.
Step 2. Move the backup to the new VPS
The two servers usually cannot see each other directly, so move the file through something they can both reach:
- Cloud storage (simplest). Upload the backup file to Google Drive, Dropbox, or similar from the old VPS, then download it in the browser on the new VPS. Avoid OneDrive for NinjaTrader files, since OneDrive and NinjaTrader do not play nicely together.
- Copy and paste over Remote Desktop. With drive redirection turned on, copy the file from the old VPS to your local PC, then paste it into the new VPS. In Remote Desktop Connection, before connecting, click Show Options > Local Resources > More and check Drives.
Step 3. Restore your setup on the new VPS
If your new server does not already have NinjaTrader 8 and the CrossTrade NT8 Add-On, install them first with the Installation guide. CrossTrade VPS users can skip this, it is already done for you.
With NinjaTrader closed on the new VPS:
- Right-click the backup file you moved over and choose Extract All.
- Copy the extracted folders (workspaces, templates, db, and the rest) into
Documents\NinjaTrader 8, replacing the existing files when Windows asks. - Start NinjaTrader. Your custom indicators and strategies recompile on first launch. If a chart looks empty at first, restart NinjaTrader once more.
Before you copy anything in, make a quick copy of the new VPS's existing Documents\NinjaTrader 8 folder (for example, rename it to NinjaTrader 8 old) so you can fall back if needed.
Step 4. Re-authorize and reconnect
Because the new VPS is a different machine, a few things need to be set up again:
- NinjaTrader license. You may be prompted to log in to your NinjaTrader account or re-enter your license key on first launch. Free and demo licenses re-register on their own. If you use a paid license and hit a machine-limit message, contact NinjaTrader support to release the old machine.
- Broker or prop firm connection. Re-add or re-enable your connection under Control Center > Connections. You will usually need to re-enter the password.
- Automated Trading Interface (ATI). Confirm the ATI is still enabled so CrossTrade can send orders. See Step 3 of the Installation guide.
Step 5. Log back in to CrossTrade
- In NinjaTrader on the new VPS, open the CrossTrade NT8 Add-On window.
- Log in with your CrossTrade email and password, the same way you did during setup.
- Open your CrossTrade dashboard and confirm the Add-On shows as connected.
If NinjaTrader is logged in to CrossTrade on both servers at once, a single webhook or automation can fire on both and place duplicate orders. Once you have verified the new VPS, log out of CrossTrade and exit NinjaTrader on the old server (or shut it down entirely) before your next live session.
Migration checklist
- Market closed (migrate outside session hours)
- Backup file created on the old VPS (Tools > Export > Backup File)
- Backup moved to the new VPS
- Backup extracted into
Documents\NinjaTrader 8on the new VPS (NinjaTrader closed) - NinjaTrader launched and recompiled
- NinjaTrader license re-authorized
- Broker or prop firm connection re-added
- CrossTrade NT8 Add-On logged in and showing connected
- Old VPS NinjaTrader shut down