Set Up Guide
Connect your platform
NinjaTrader 8: install the Add-On. Tradovate: link your account.
Create an alert on TradingView
Add your webhook URL and alert message
Review Alert History
Check your alerts on the Alert History page
Only Step 1 differs between platforms.
NinjaTrader 8 runs through the CrossTrade NT8 Add-On on your Windows desktop. Step 1 (NinjaTrader 8) below walks through the install.
Tradovate has nothing to install: link your account once and route alerts to it with a single extra line in the alert message. The Tradovate guides cover the full path in depth.
Step 1 (NinjaTrader 8) - Download and Install the Add-On
Download the add-on from crosstrade.io/download, then follow the steps below.
Install the Add-On
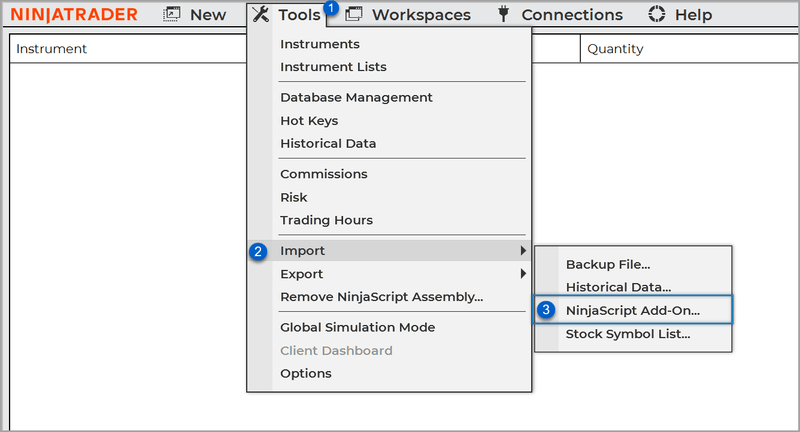
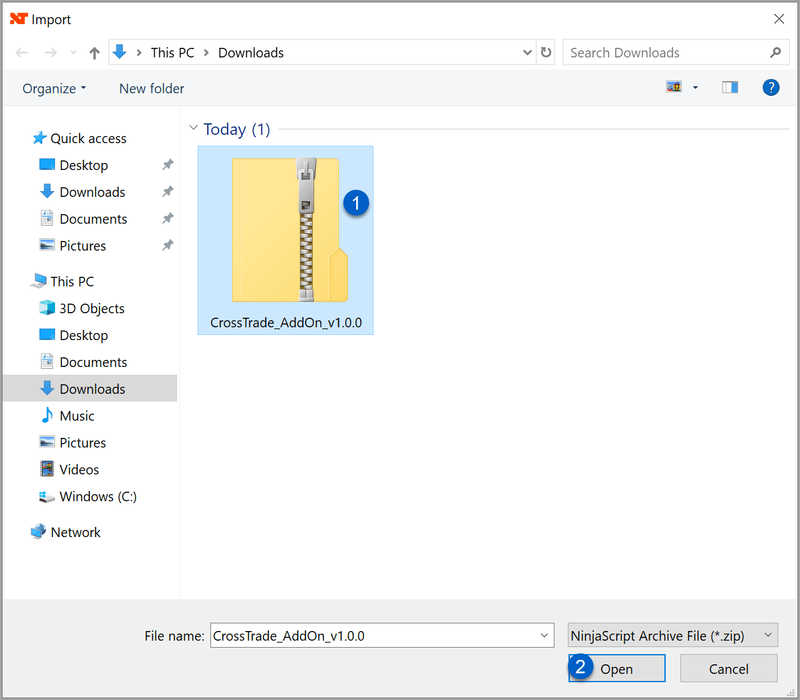
Open NinjaTrader and go to Tools → Import → NinjaScript Add-On, then select the file you downloaded.
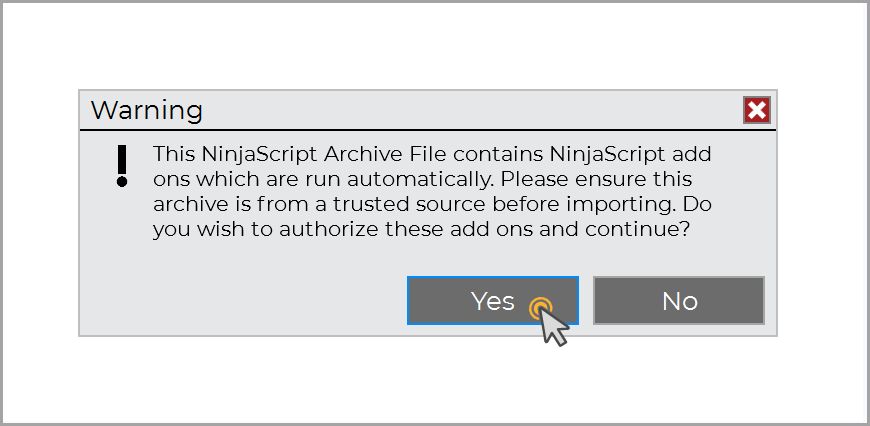
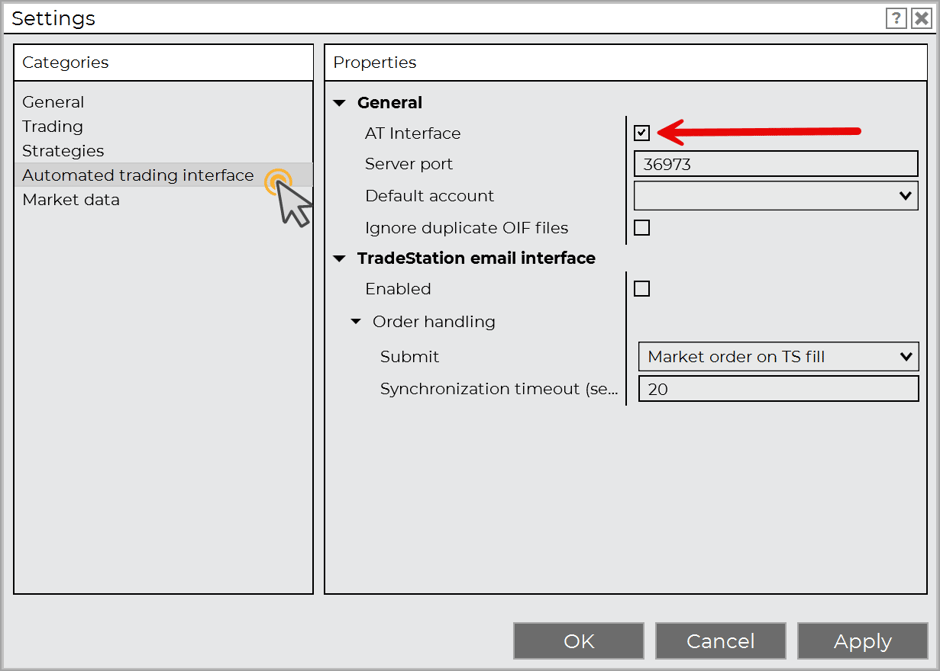
Before you restart NinjaTrader, enable the ATI!
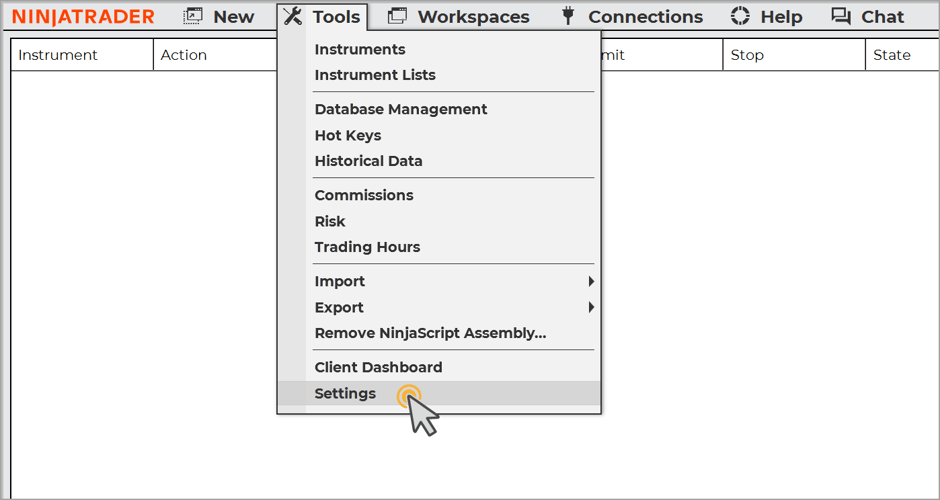
Enable the NinjaTrader ATI
The Automated Trading Interface lets NinjaTrader accept external commands. Enable it under Tools → Options → Automated Trading Interface.
Now restart NinjaTrader
Connect to Live Data
Order execution needs a live data connection, either a NinjaTrader data subscription or the feed provided with a prop evaluation account.
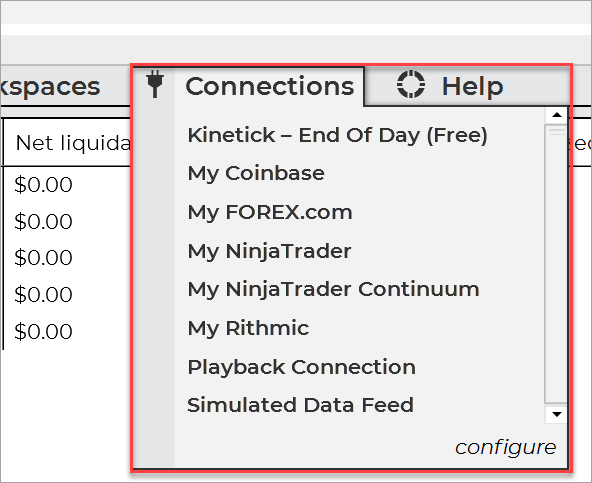
Level 1 data is sufficient for XT orders - Level 2 data is not required.
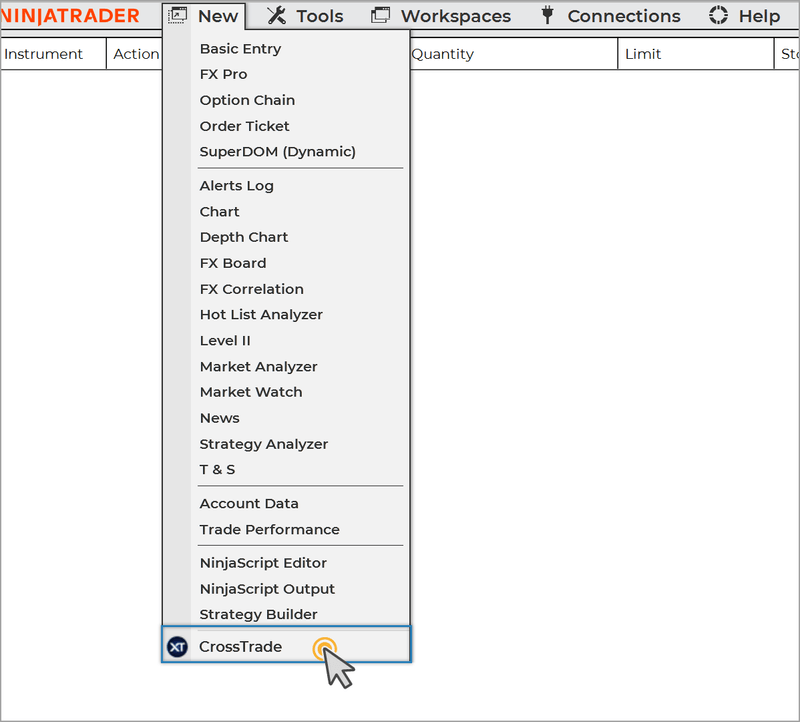
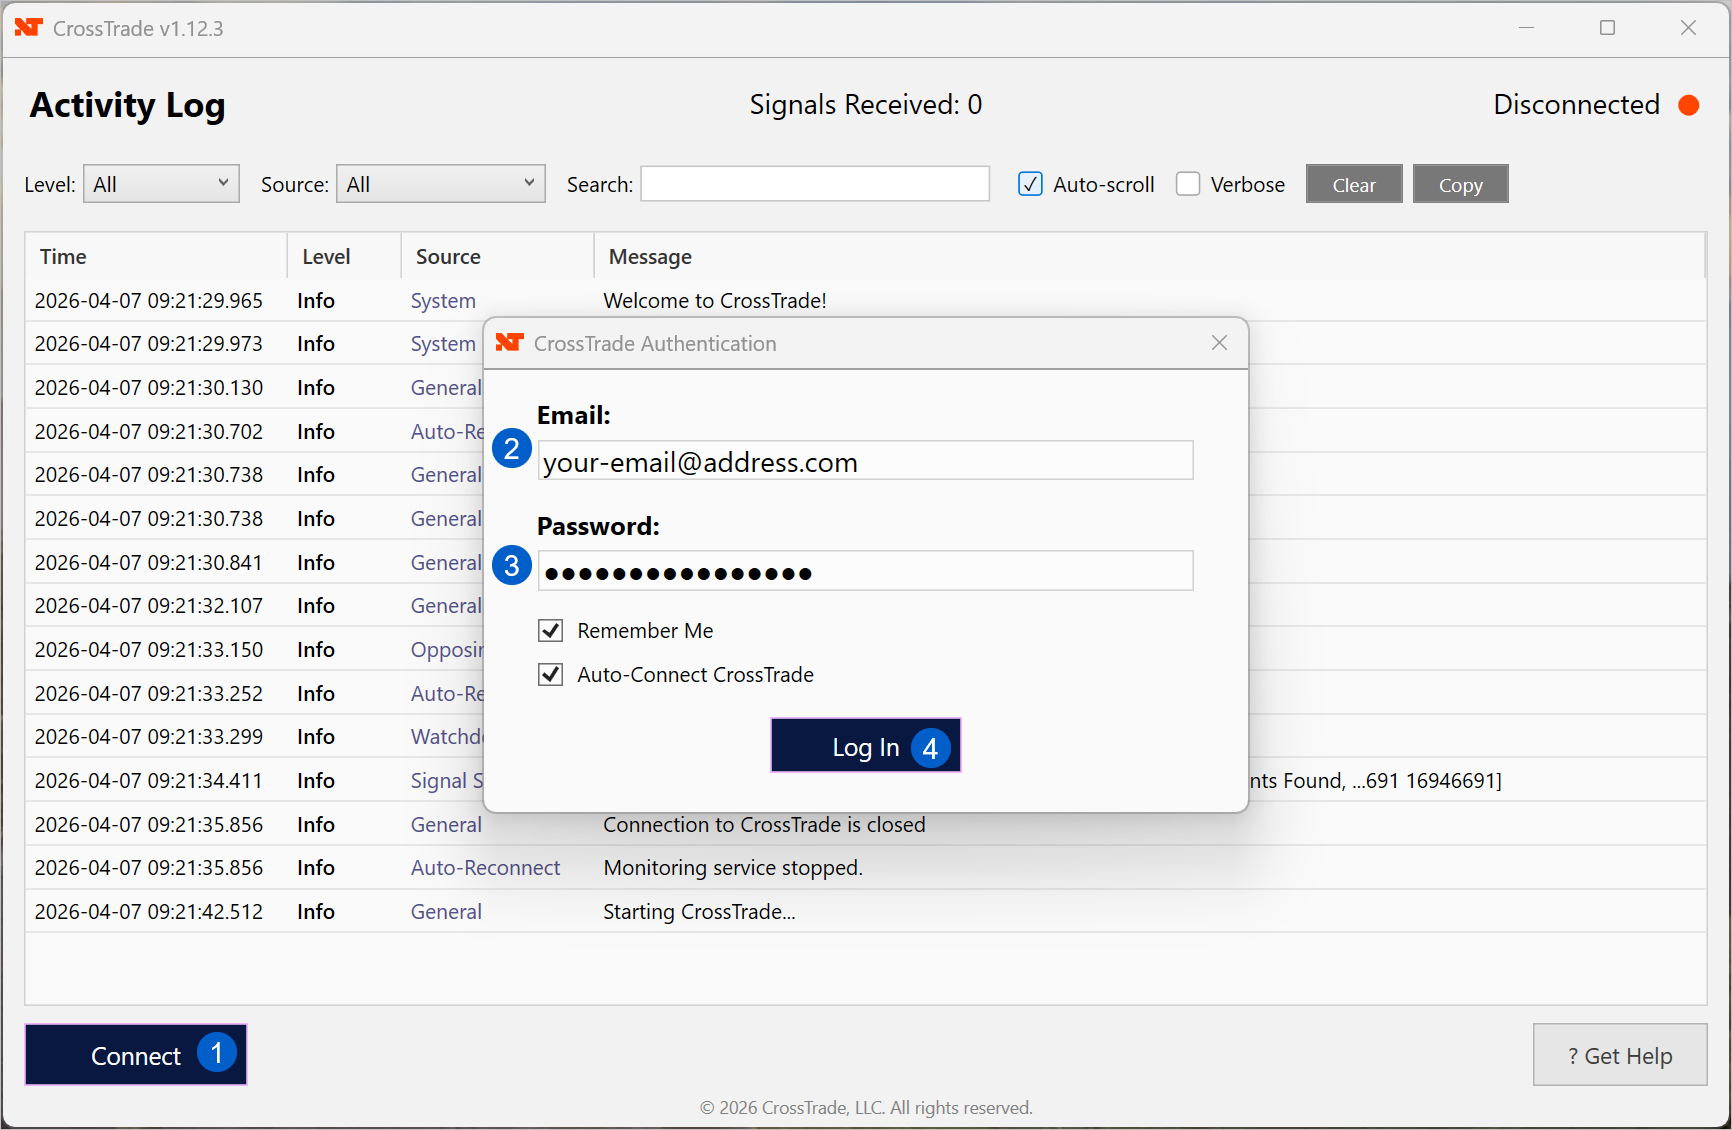
Log In to CrossTrade
After restarting NinjaTrader, open the CrossTrade add-on and log in with your email and password.
Step 1 (Tradovate) - Link Your Tradovate Account
Linking is the whole "installation" for Tradovate. There's no download and nothing to keep running: you authorize CrossTrade once through Tradovate's own sign-in screen, and from then on CrossTrade routes your webhook orders to Tradovate's cloud API directly, even when your computer is off.
Head to My Account → Brokers or the guided Tradovate setup page and pick the right door:
- Link Live is for a personal real-money Tradovate brokerage login.
- Link Demo is for Tradovate sim accounts and every prop firm login (Lucid, Tradeify, and other Tradovate-based firms), including funded/PA accounts.
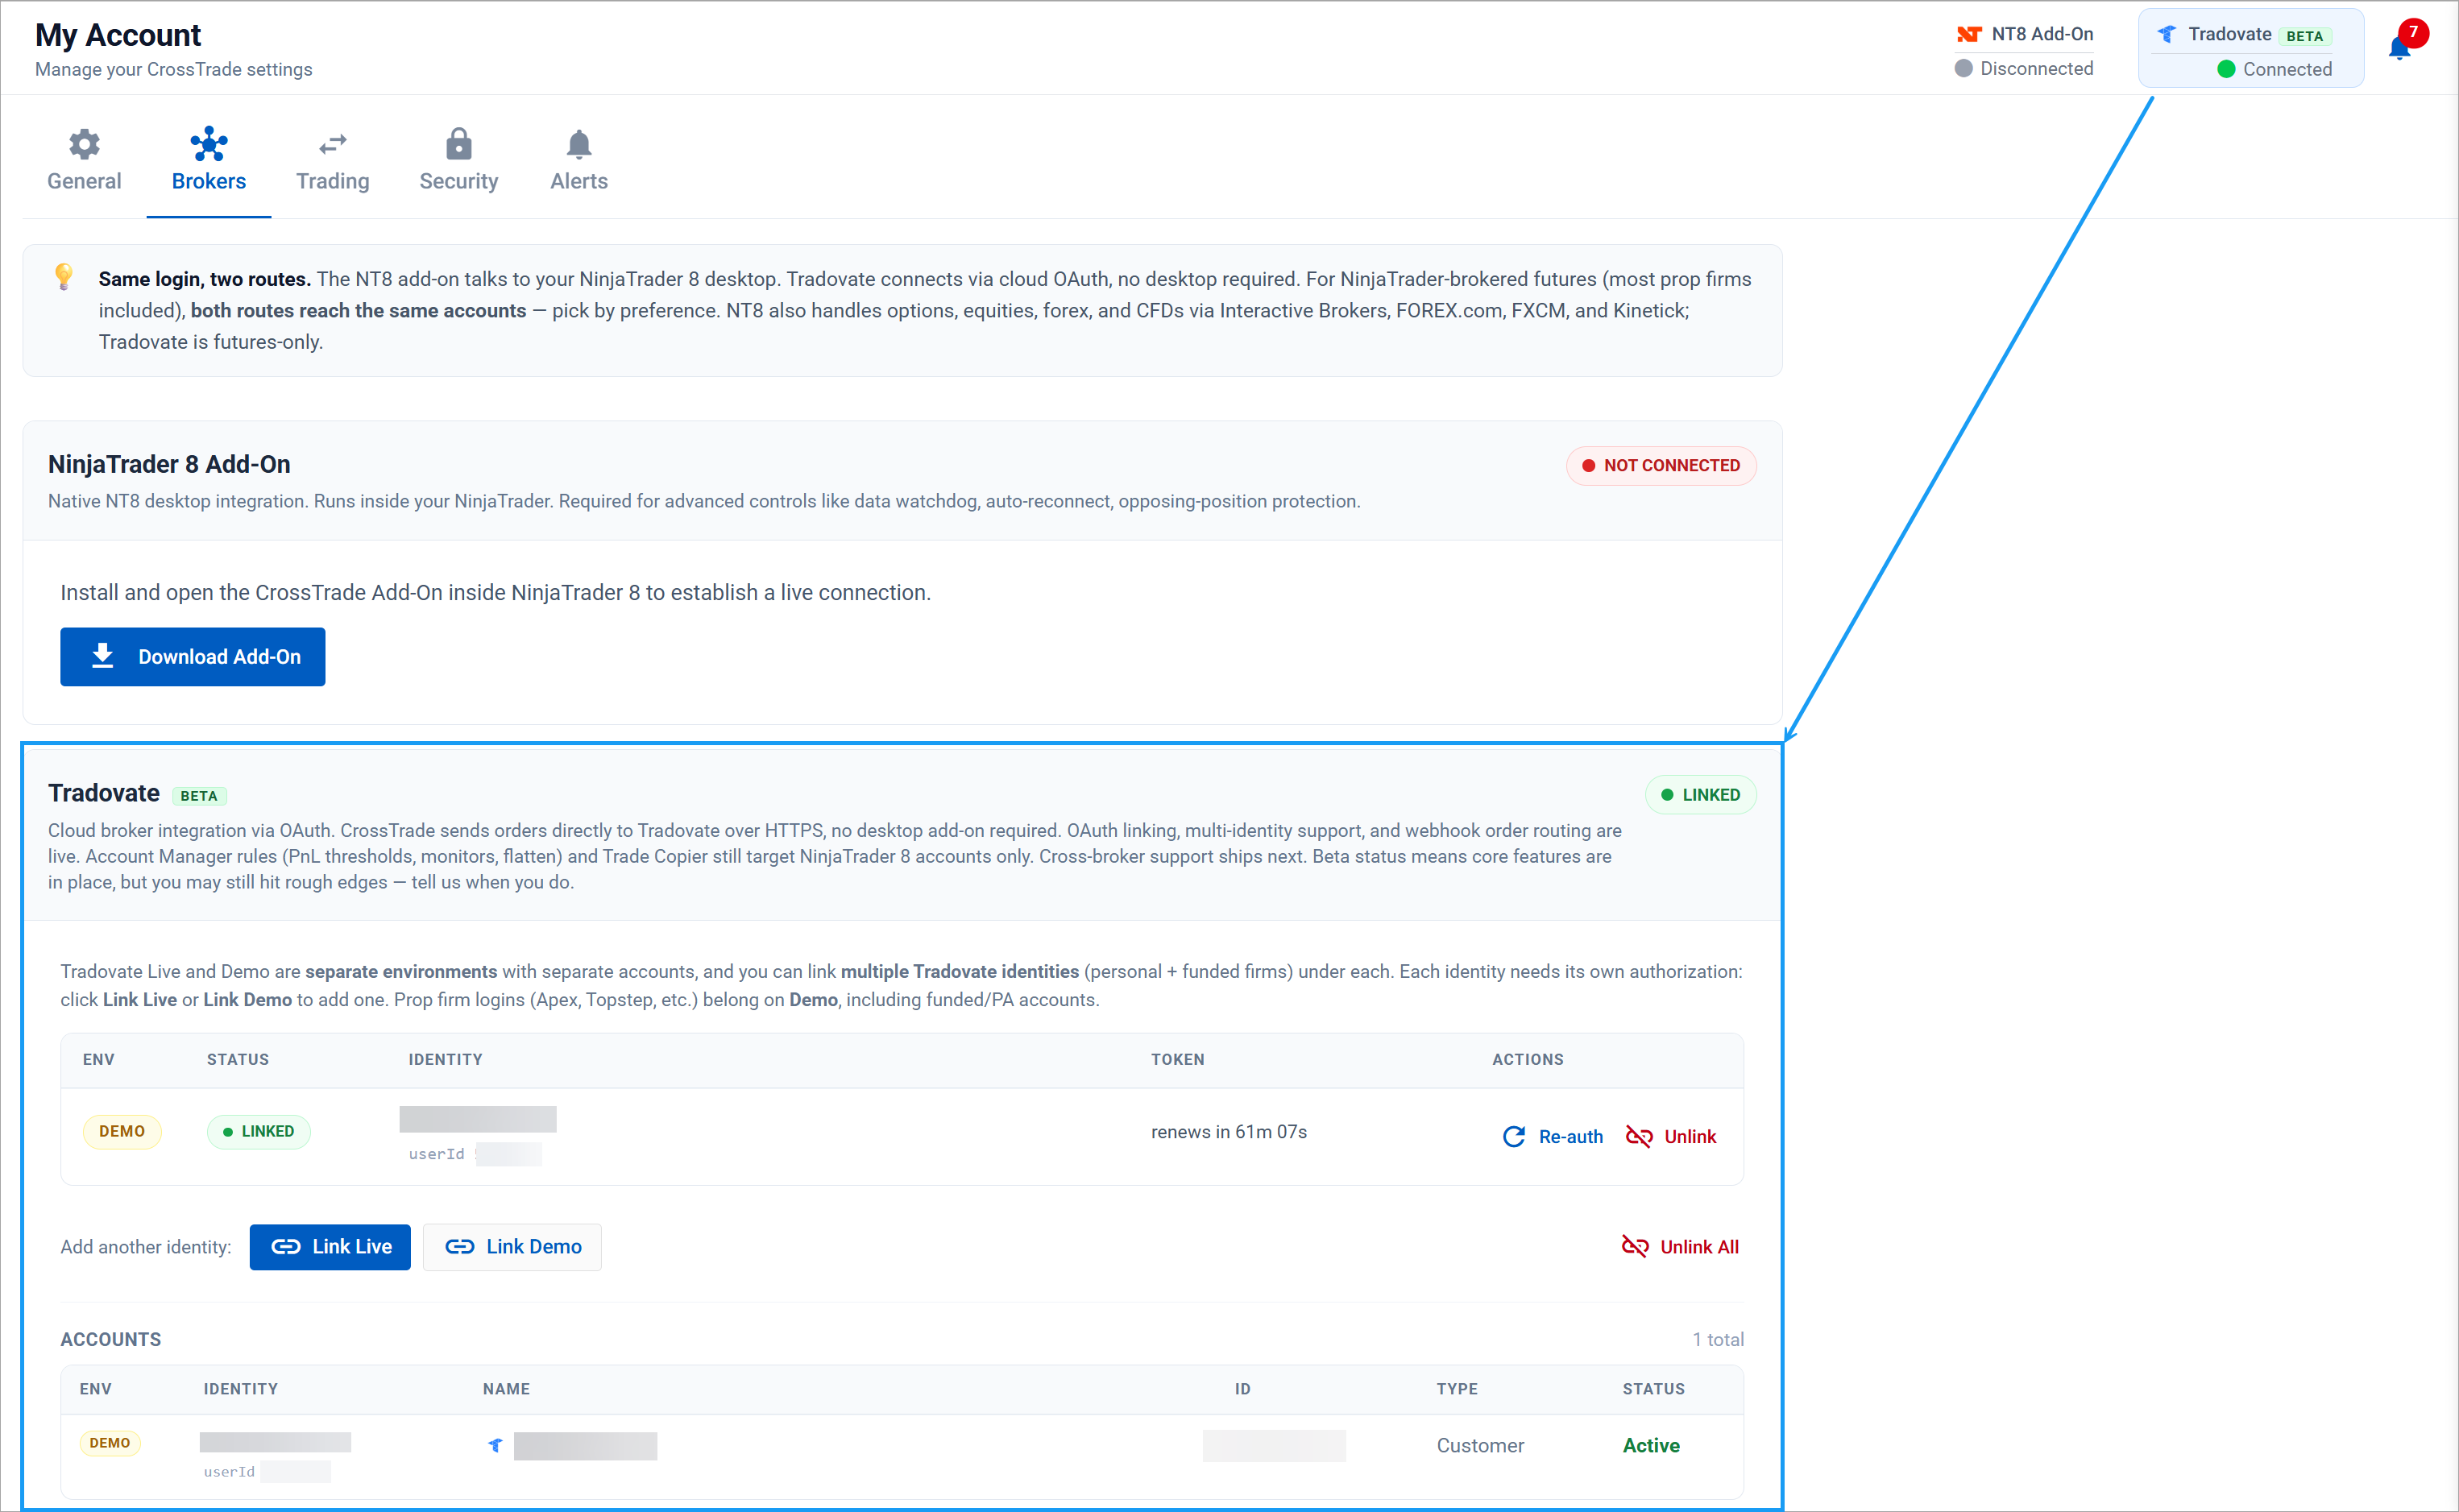
For the full picture on environments, multiple identities, and fixing an expired link, see Linking Your Tradovate Account.
Step 2 - Create a TradingView Alert
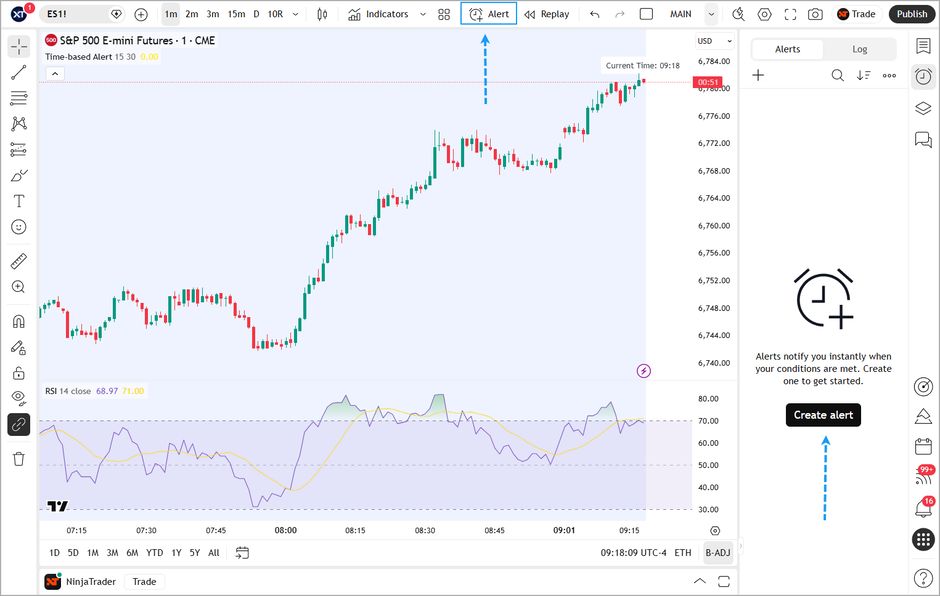
Open a Superchart in TradingView and create an alert from the toolbar or the right-hand panel.
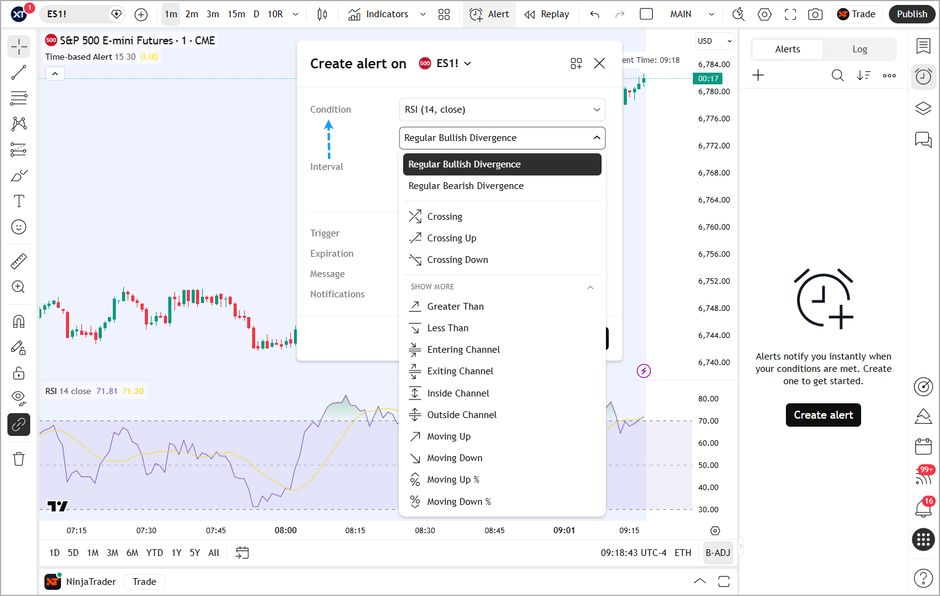
Determine your Alert Conditions
Choose the trigger condition, whether the alert fires once or on every trigger, an expiration, and a name to keep your alerts organized.
TradingView alerts do not update automatically.
If you change settings for your Strategy or Indicator, previously created alerts do not dynamically update to reflect those new settings. Alert condition triggers are tied to the settings when created and remain married.
To update alerts, reopen the Condition dropdown and select the latest instance with the active settings at the bottom of the dropdown list.
Provide payload information
The Message field holds the command CrossTrade sends to your broker.
Clear the Message field before you paste.
TradingView pre-fills it with a long line of your indicator's own text, something like Bot V3 (14, 30, NORMAL): order buy @ 1 filled on ES1!. Delete all of it. Only the CrossTrade command can be present.
Here is a basic PLACE command for a Buy Market order.
key=your-crosstrade-secret-key;
command=place;
account=sim101;
instrument=ES1!;
action=buy;
qty=1;
order_type=market;
tif=day;
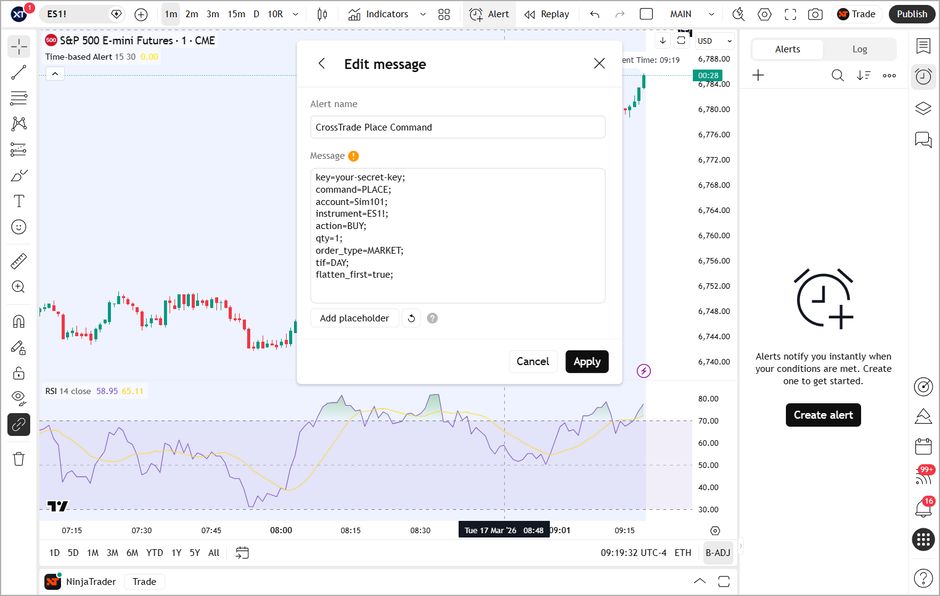
The same command routes to Tradovate by adding one line, destination=tradovate;, and using your Tradovate account name (shown in My Account → Brokers after linking). Without that line, alerts go to NinjaTrader 8, the default destination.
key=your-crosstrade-secret-key;
command=place;
account=DemoAccount;
instrument=ES1!;
action=buy;
qty=1;
order_type=market;
tif=day;
destination=tradovate;
See Your First Automated Trade (Tradovate) for the full walkthrough.
Automating a strategy instead? Use the strategy variables:
key=your-crosstrade-secret-key;
command=place;
account=Sim101;
instrument=ES1!;
action={{strategy.order.action}};
qty={{strategy.order.contracts}};
order_type=market;
tif=day;
sync_strategy=true;
market_position={{strategy.market_position}};
prev_market_position={{strategy.prev_market_position}};
target_quantity={{strategy.position_size}};
out_of_sync=resync;
This command uses Strategy Sync logic and is designed to allow your TradingView strategy to send both entries and exits without interference. If you intend to have NinjaTrader handle the exit logic, you will need to remove the Sync logic (last 5 lines) and add trade brackets or an ATM strategy.
out_of_sync=resync; tells CrossTrade to correct a drifted position automatically, which is why it's the default in our examples. target_quantity is required for it: resync needs the exact size to correct to. Prefer to be flattened instead of corrected? Use out_of_sync=flatten; and drop the target_quantity line. Full details in Strategy Synchronization.
Add Webhook URL
Your webhook URL is on the Dashboard and on your My Account page.
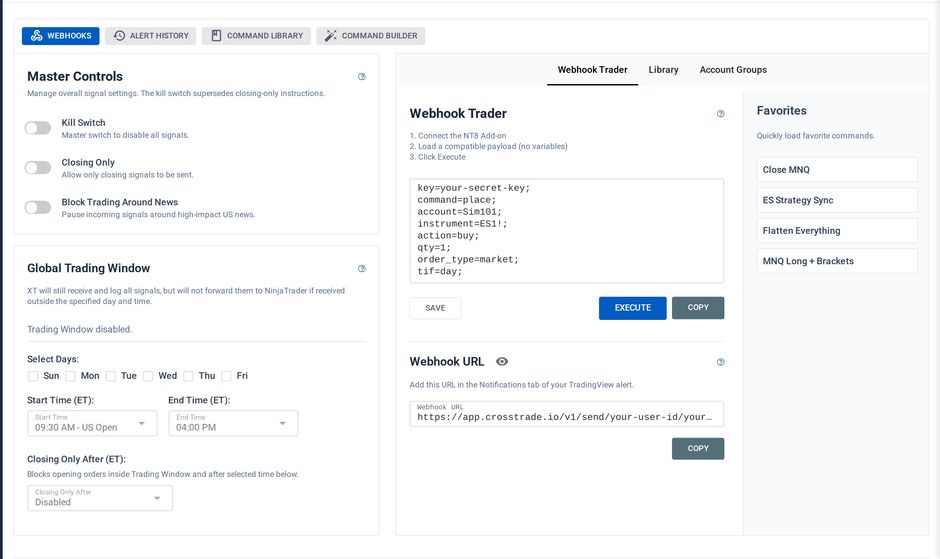
Paste Webhook URL
On the Notifications tab of the alert window, paste your CrossTrade webhook URL. Webhooks require 2FA to be enabled on your TradingView account.
Once enabled, you can add the webhook URL into the field and save the alert.
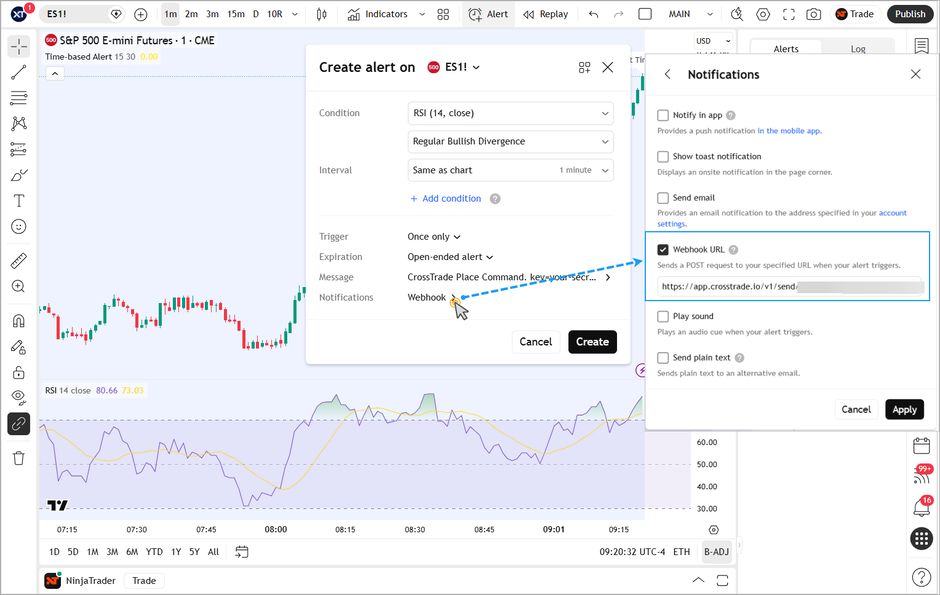
TradingView alerts do not update when you change a condition in your indicator, strategy, or chart settings. After any change, update the alert in the Condition dropdown.
Step 3 - Reviewing Alerts on CrossTrade.io
Every alert you send lands on the CrossTrade Alert History page, whether it routed to NinjaTrader 8 or Tradovate.
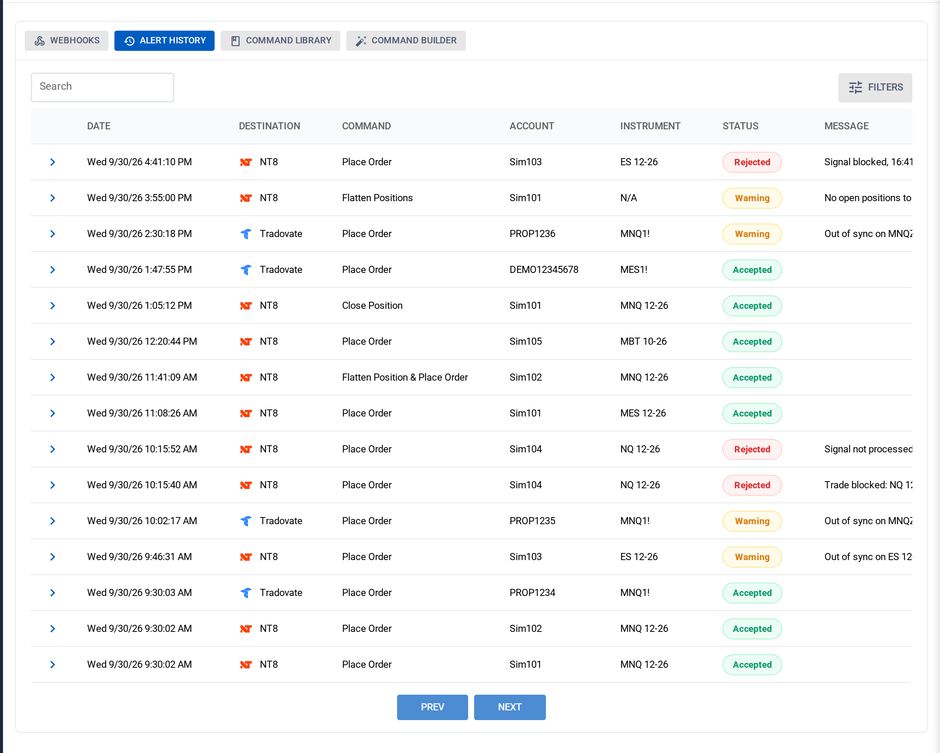
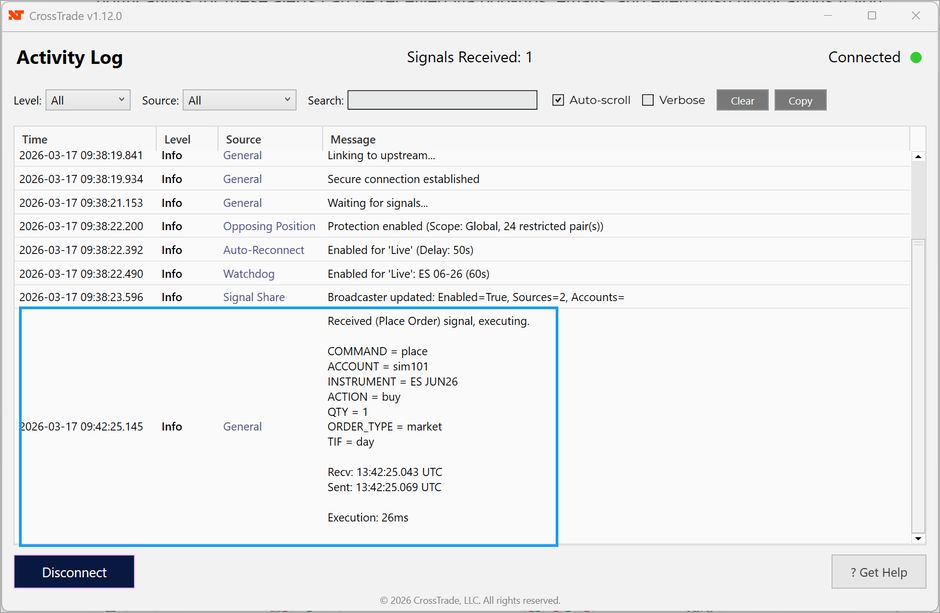
The CrossTrade NT8 Add-On shows every alert it receives as well.