Connecting TradingView to Interactive Brokers on NinjaTrader 8
Learn how to connect TradingView to your Interactive Brokers account on NinjaTrader 8 using the CrossTrade Add-on.

Connecting TradingView's powerful charting and alert system to your Interactive Brokers account through NinjaTrader 8. This integration allows you to execute trades based on TradingView's indicators or strategies into your IBKR brokerage account.
TWS 10.33.1b or latest.
The setup involves three main components working together: Interactive Brokers provides the brokerage and market access, NinjaTrader 8 serves as the trading platform and order management system, and CrossTrade acts as the bridge that receives TradingView webhook alerts and translates them into executable orders.
While this might seem complex initially, the automation benefits are significant. You can open up the doors to an endless amount of TradingView tools that can be automated through CrossTrade. To take things a step further, you can leverage CrossTrade's NT Account Manager to provide risk management oversight and control your day trading.
Part 1: Interactive Brokers Setup
You have two platform options with Interactive Brokers and this guide will cover both options. NinjaTrader recommends using Trader Workstation.
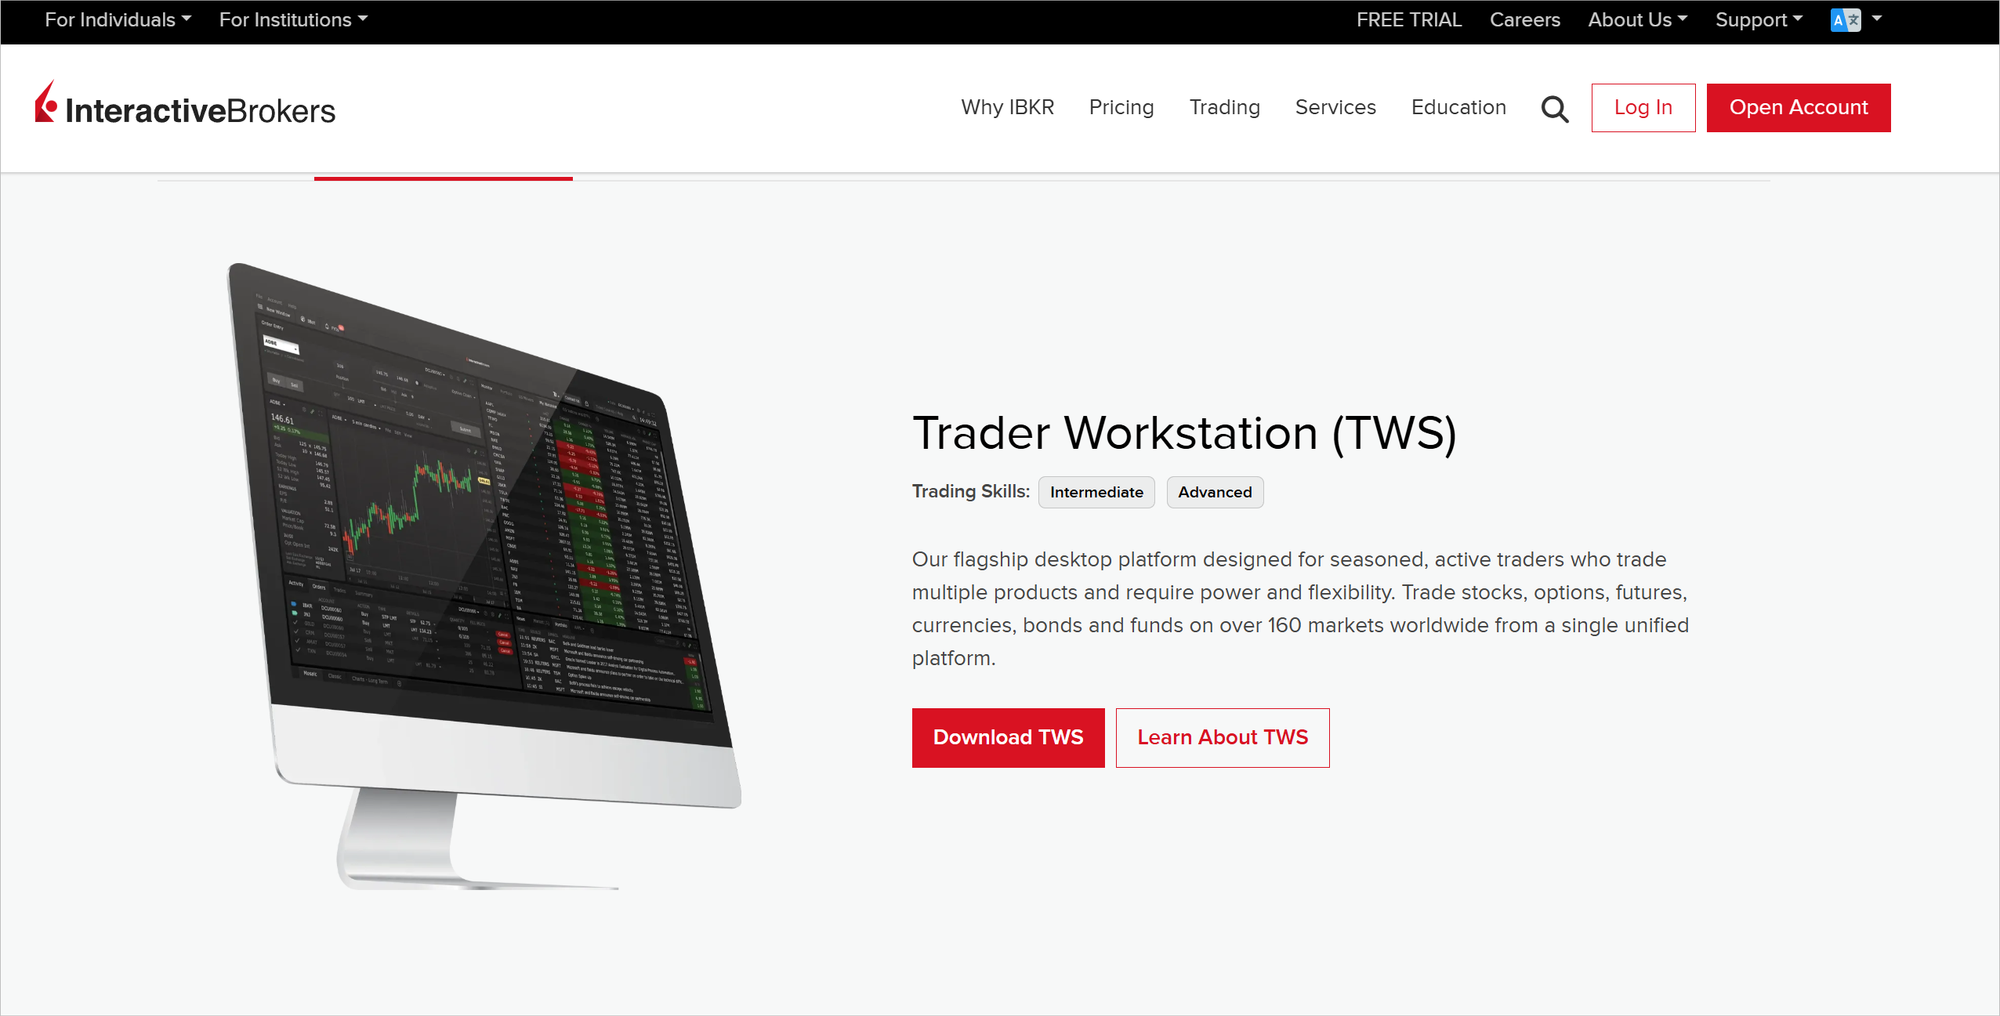
Option 1 : Install the Trader Workstation
Option 2: Install IB Gateway, a lighter, headless version of TWS. This option is considered 'unsupported' by NinjaTrader, so use at your own risk
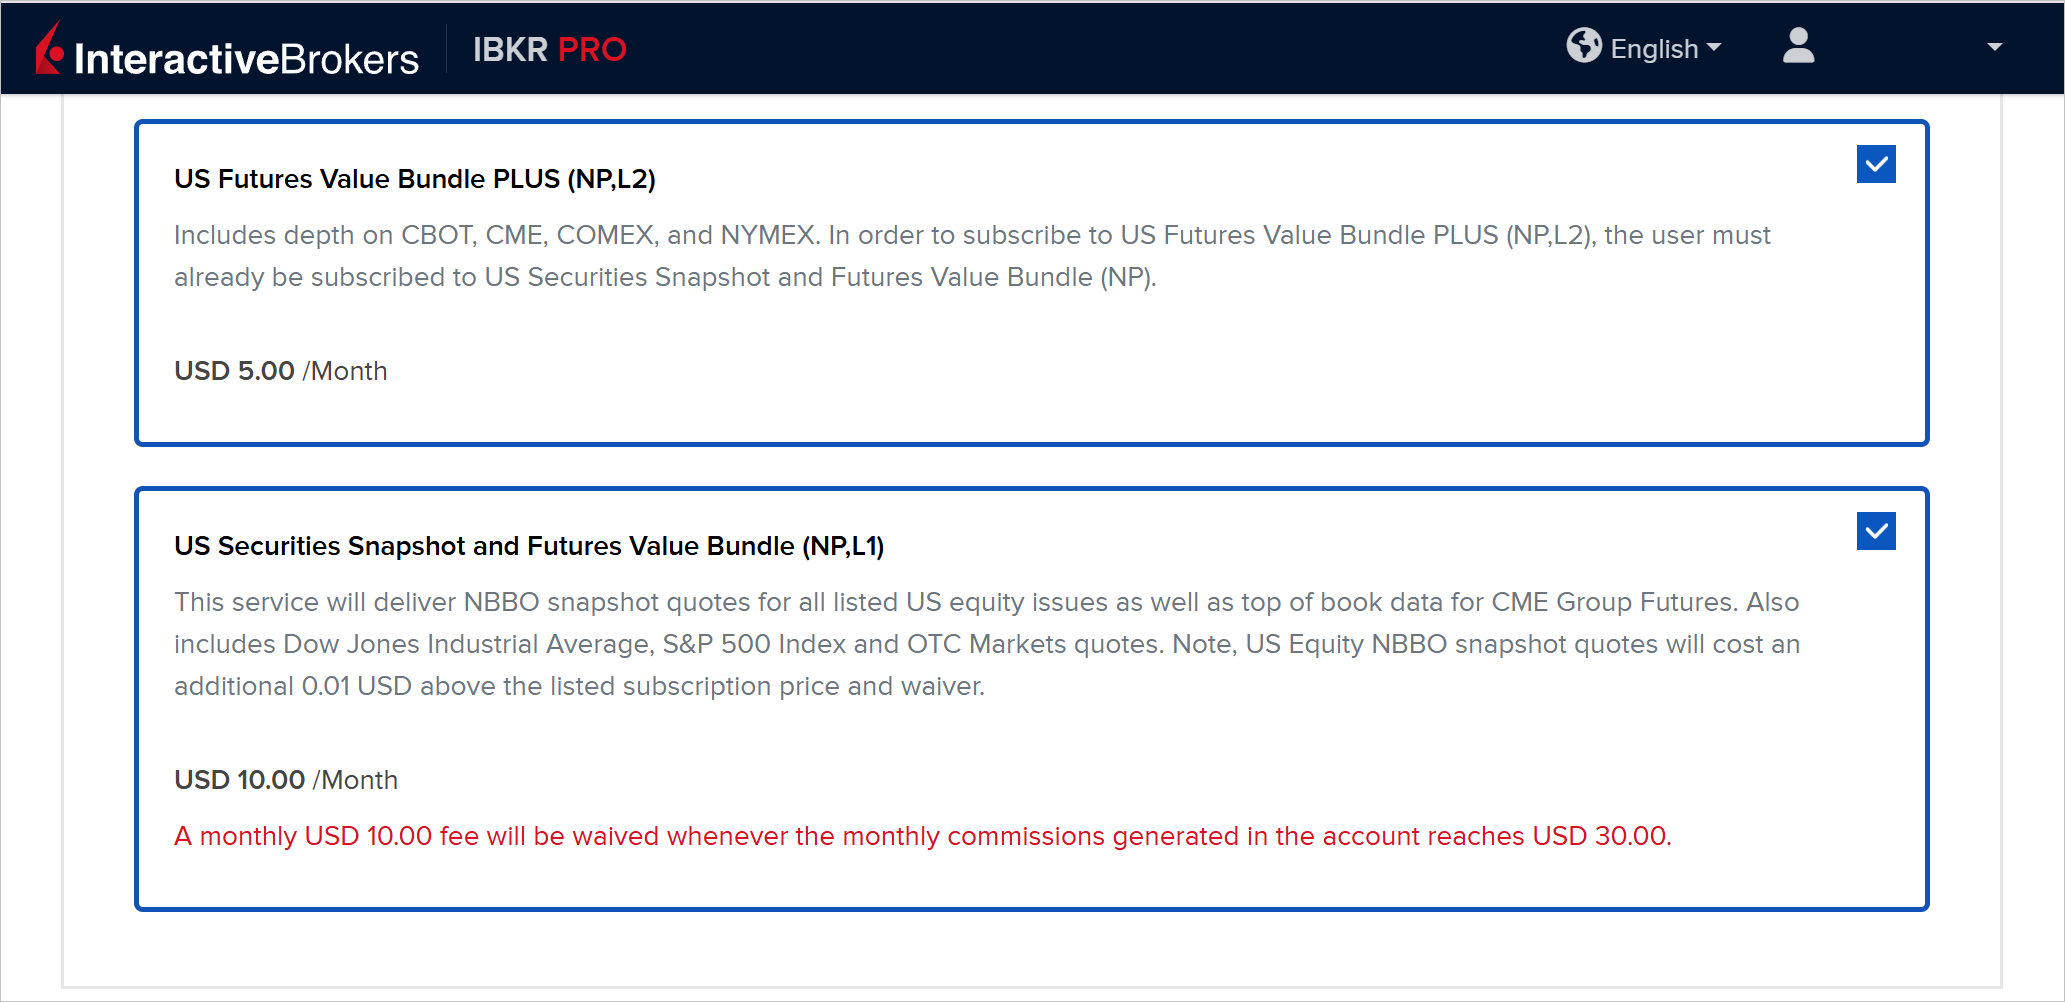
For either option, you will need a data subscription from IBKR. The US Securities Snapshot and Futures Value Bundle will provide Level 1 data. You can additionally purchase the Value Bundle PLUS if you would like Level 2 data.
Option 1: Install Trader Workstation
- Download Trader Workstation from Interactive Brokers.
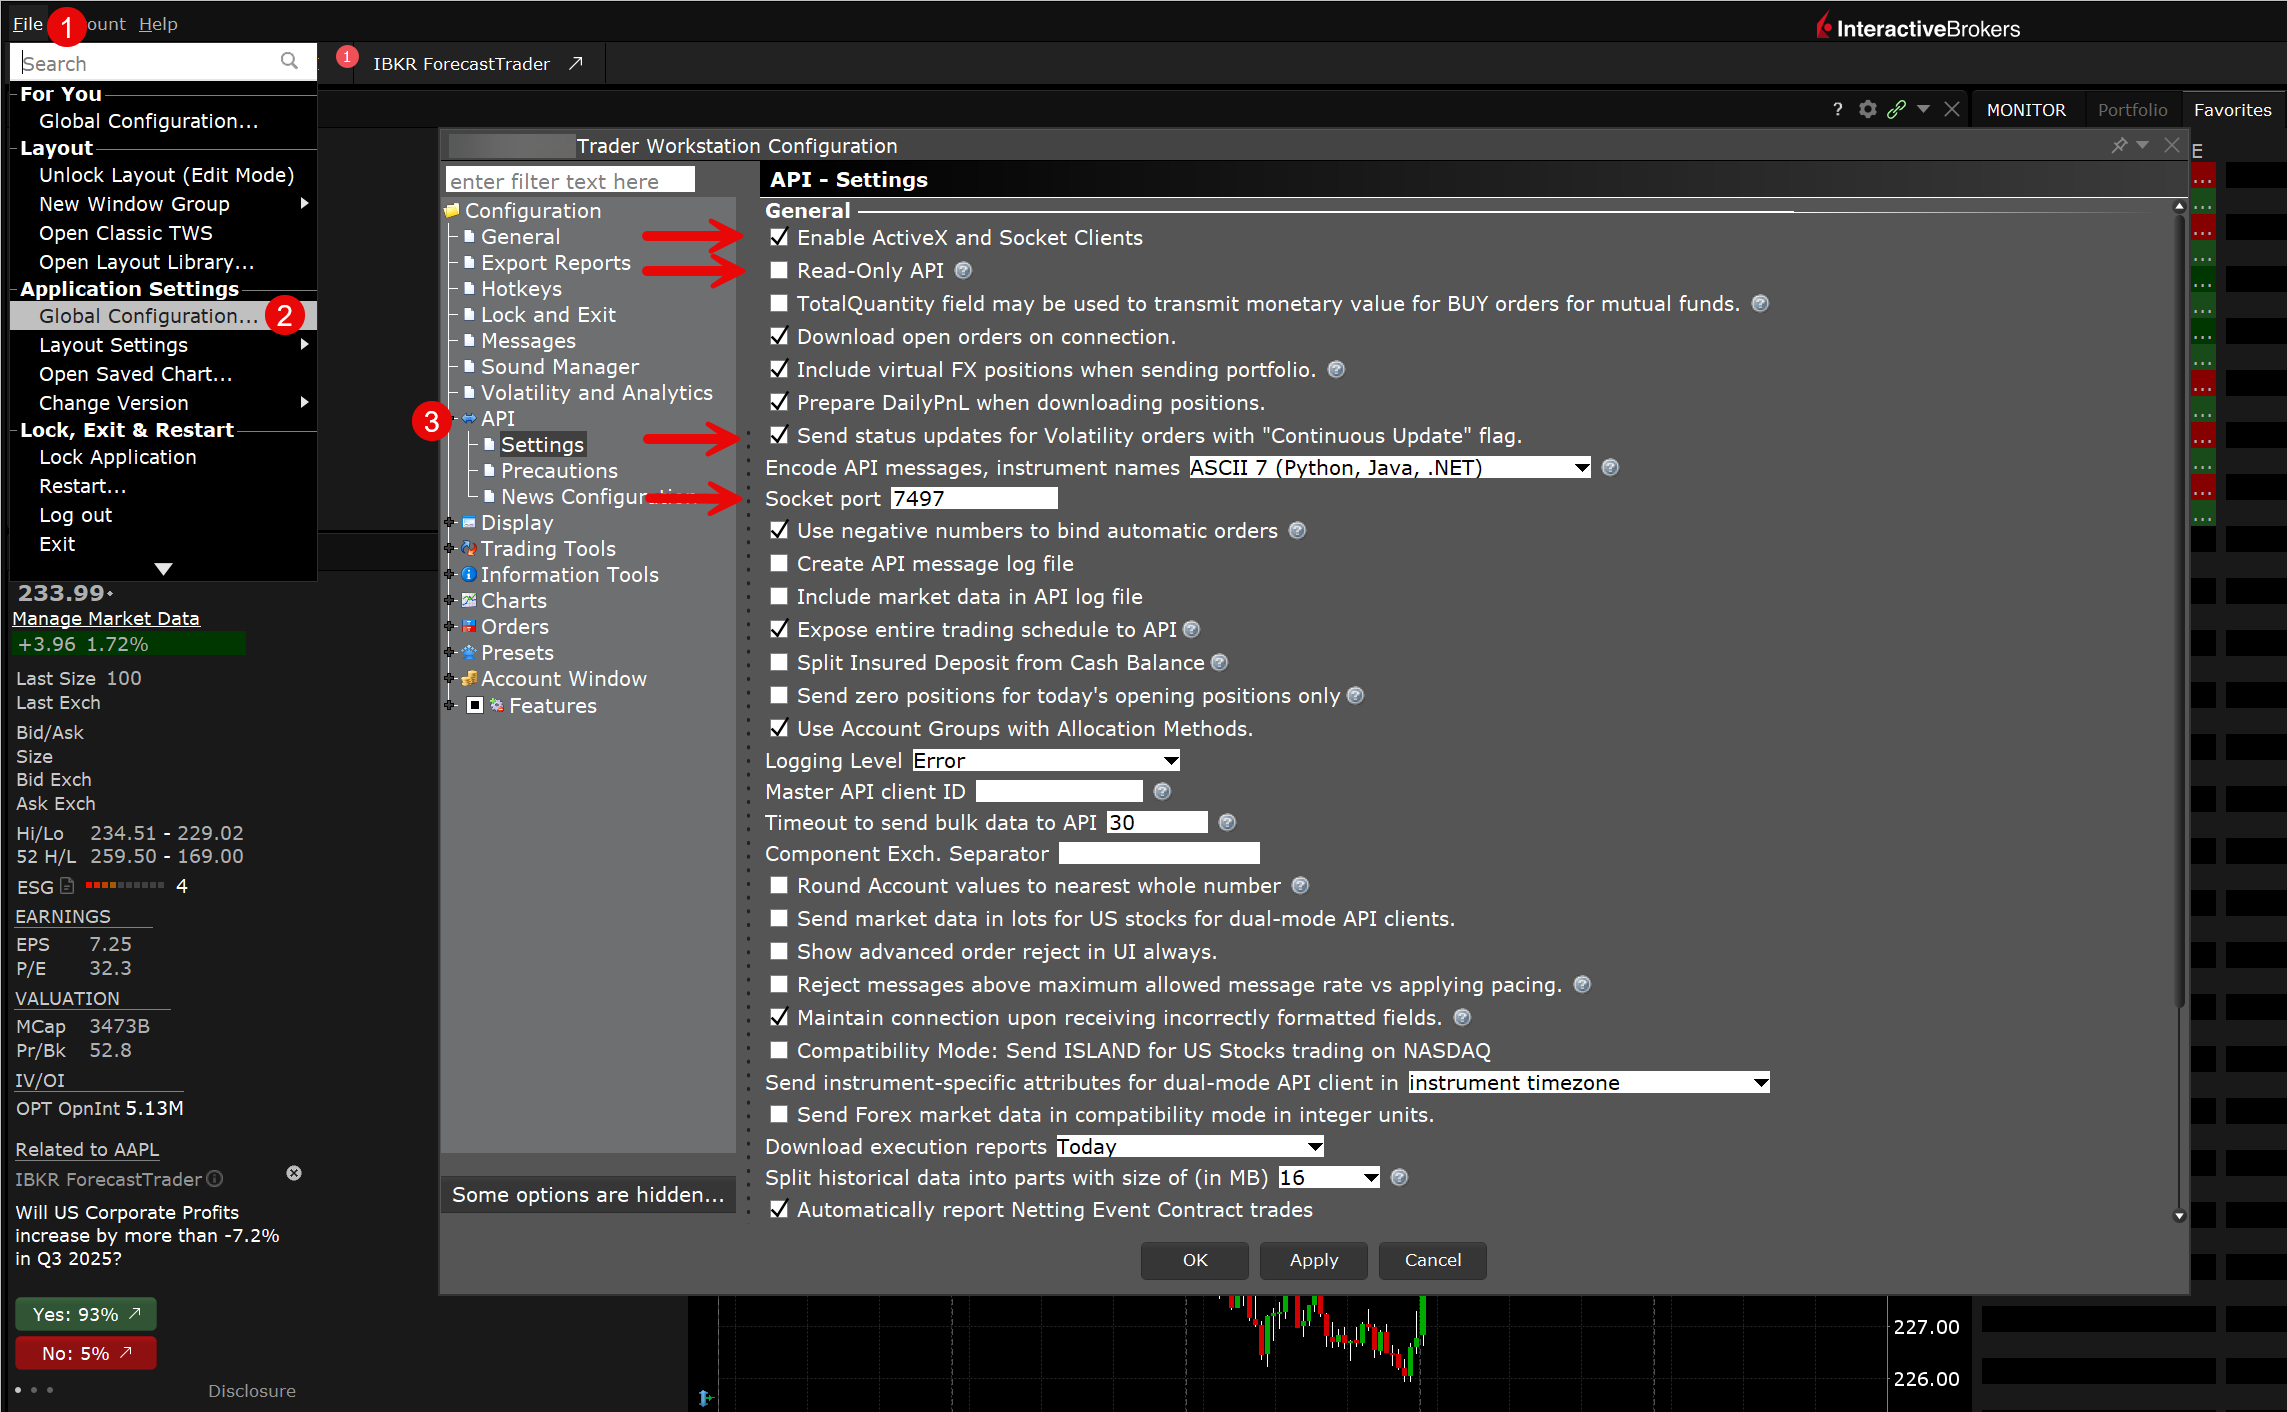
Login in to either the live or paper environment and go to File > Global Configuration > API Settings.
Ensure the following:
- Check - Enable ActiveX and Socket Clients
- Uncheck - Read Only API (for live trading)
- Check - Download Open orders on connection
- Check - Include virtual FX positions when sending portfolio
- Check - Send status updates for volatility orders...
Paper Trading vs Live
- Paper Trading Port: 7496
- Live Trading Port: 7497
- Start with paper trading to test the connection
Option 2: Install IB Gateway
If you have TWS already installed on your machine, you will need to specify a different file directory as 'Jts' will already exist.
- Download IB Gateway from Interactive Brokers website

Configure IB Gateway Settings
- Launch IB Gateway and log in
- Go to Configure → Settings → API
- Enable these critical settings:
- Uncheck Read-Only API
- Change Socket port to 7497 (live) or 7496 (paper trading)
- Master API client ID (set to 0)

Paper Trading vs Live
- Paper Trading Port: 7496
- Live Trading Port: 7497
- Start with paper trading to test the connection
Part 2: NinjaTrader 8 Configuration
Add Interactive Brokers Connection
- Open NinjaTrader 8
- On the top navigation click Connections then Configure
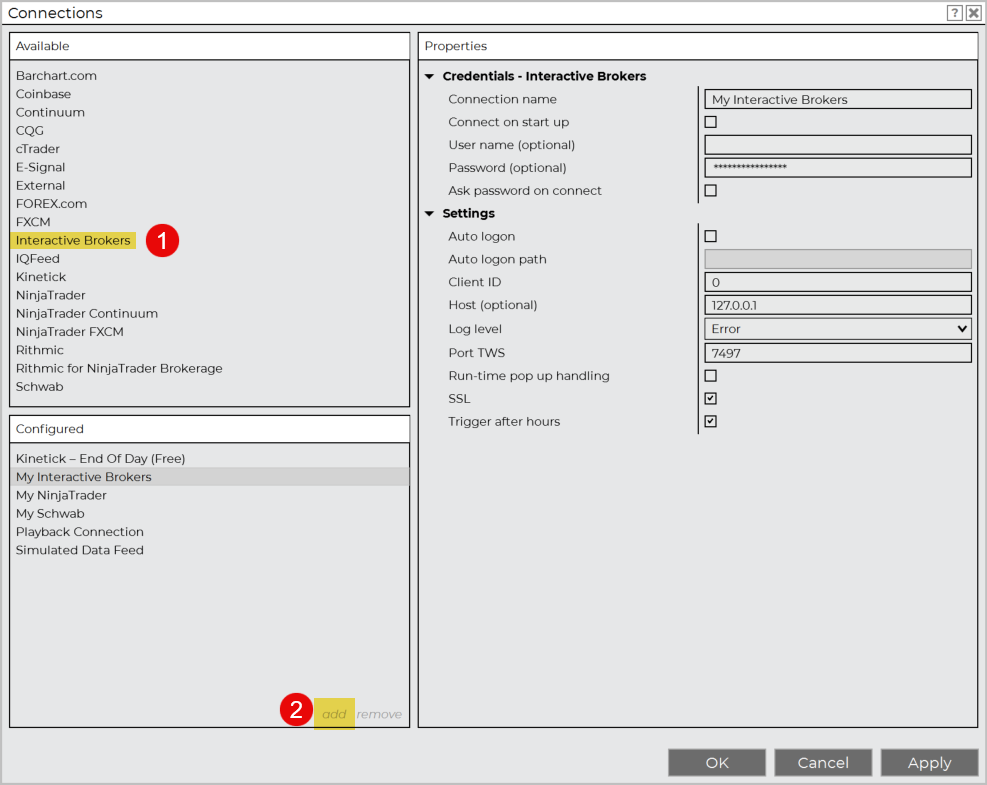
- Select Interactive Brokers from the list and click add
Connection Settings
Configure these parameters:
Basic Settings:
- Connection Name: IB Live (or IB Paper)
- Host: 127.0.0.1 (localhost)
- Port: 7497 (live) or 7496 (paper)
- Client ID: 0 (must be unique if running multiple connections)
Part 3: Connection Process
Startup Sequence
- Start TWS or IB Gateway first - wait for full login
- Verify API settings are enabled
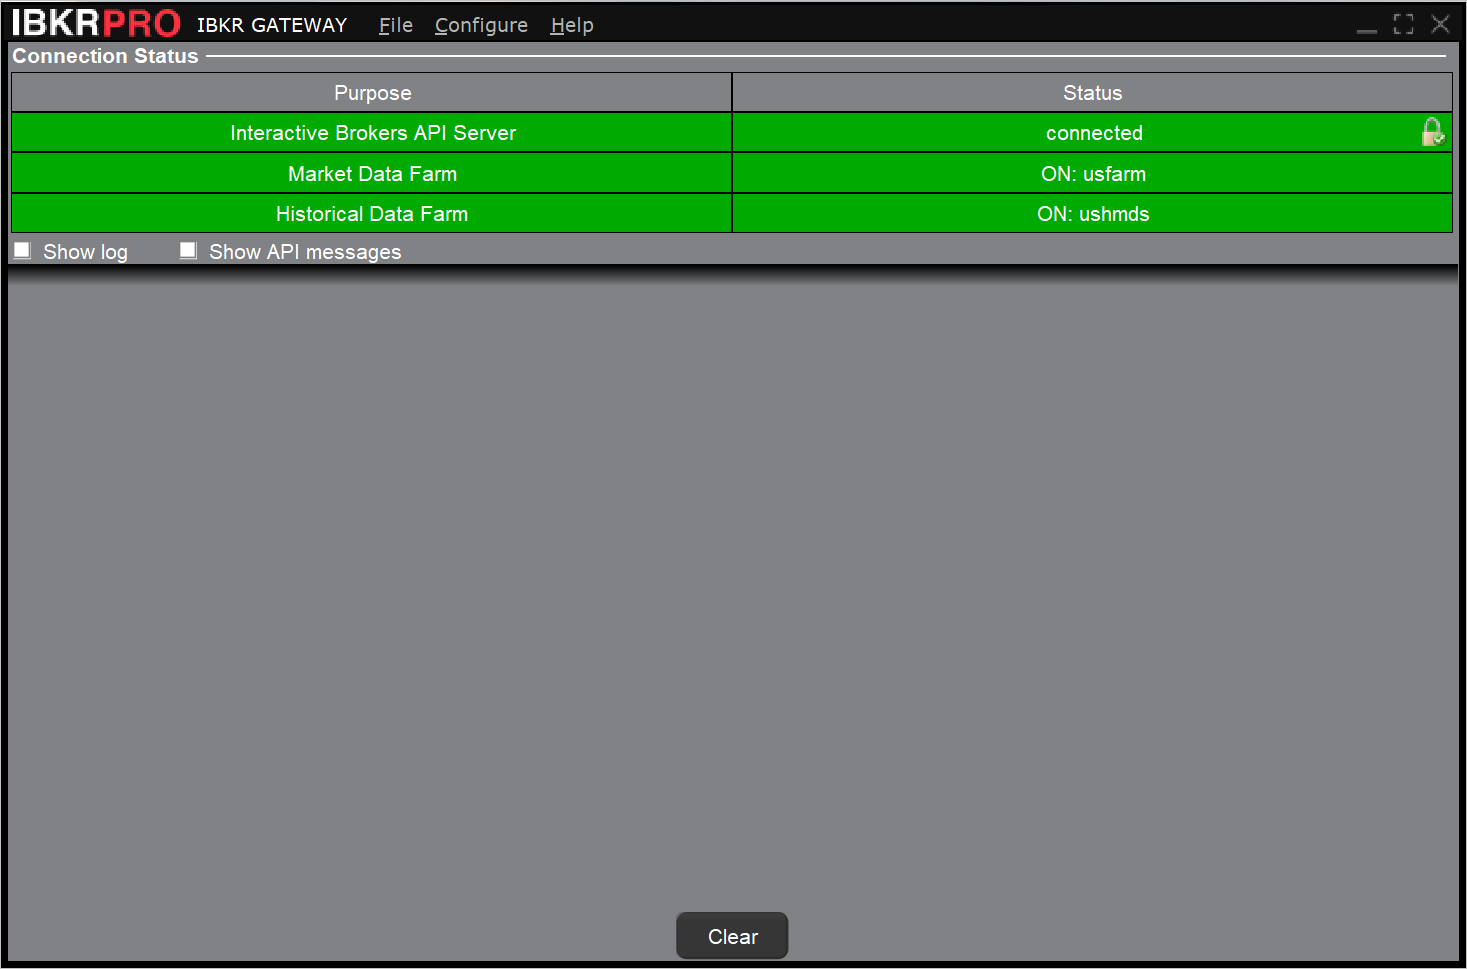
- Start NinjaTrader and connect to the IBKR data connection. The status bar at the bottom will display a green dot "🟢" indicating a active connection. It's important to start IB Gateway before NinjaTrader to ensure that the connection port is ready.
When connecting to IBKR Paper, your account name will start with DUNXXXXX. When connecting to IBKR Live, your account name will start with UXXXXXX. You can see the full account name on NinjaTrader 8 by clicking on the Accounts tab.
For optimal performance, we recommend using a CrossTrade VPS to ensure NinjaTrader 8 and TWS have a stable and fast connection.
Part 4: TradingView Setup
- Create your TradingView account
- Subscribe to the Essentials plan or higher to enable webhooks
- Subscribe to TradingView data (In addition to IBKR data on NT8)

Part 5: Connect TV to NT8 with CrossTrade
Now for the fun part... you can send webhook orders from TradingView directly into the IBKR account you have on NinjaTrader 8 using CrossTrade.
Our Help Docs provide a complete Set Up Guide with instructions on how to use TradingView alerts and additional details on all our NT8 tools.
- Go to CrossTrade and sign up for an account. The Standard plan enables sending unlimited webhooks from TradingView to NT8.
- Follow the Set-Up guide to install the CrossTrade Add-On into NT8.
- Copy and paste your Webhook URL into the Notifications tab of a TradingView alert. Your webhook is permanent and will be saved for all alerts you create.
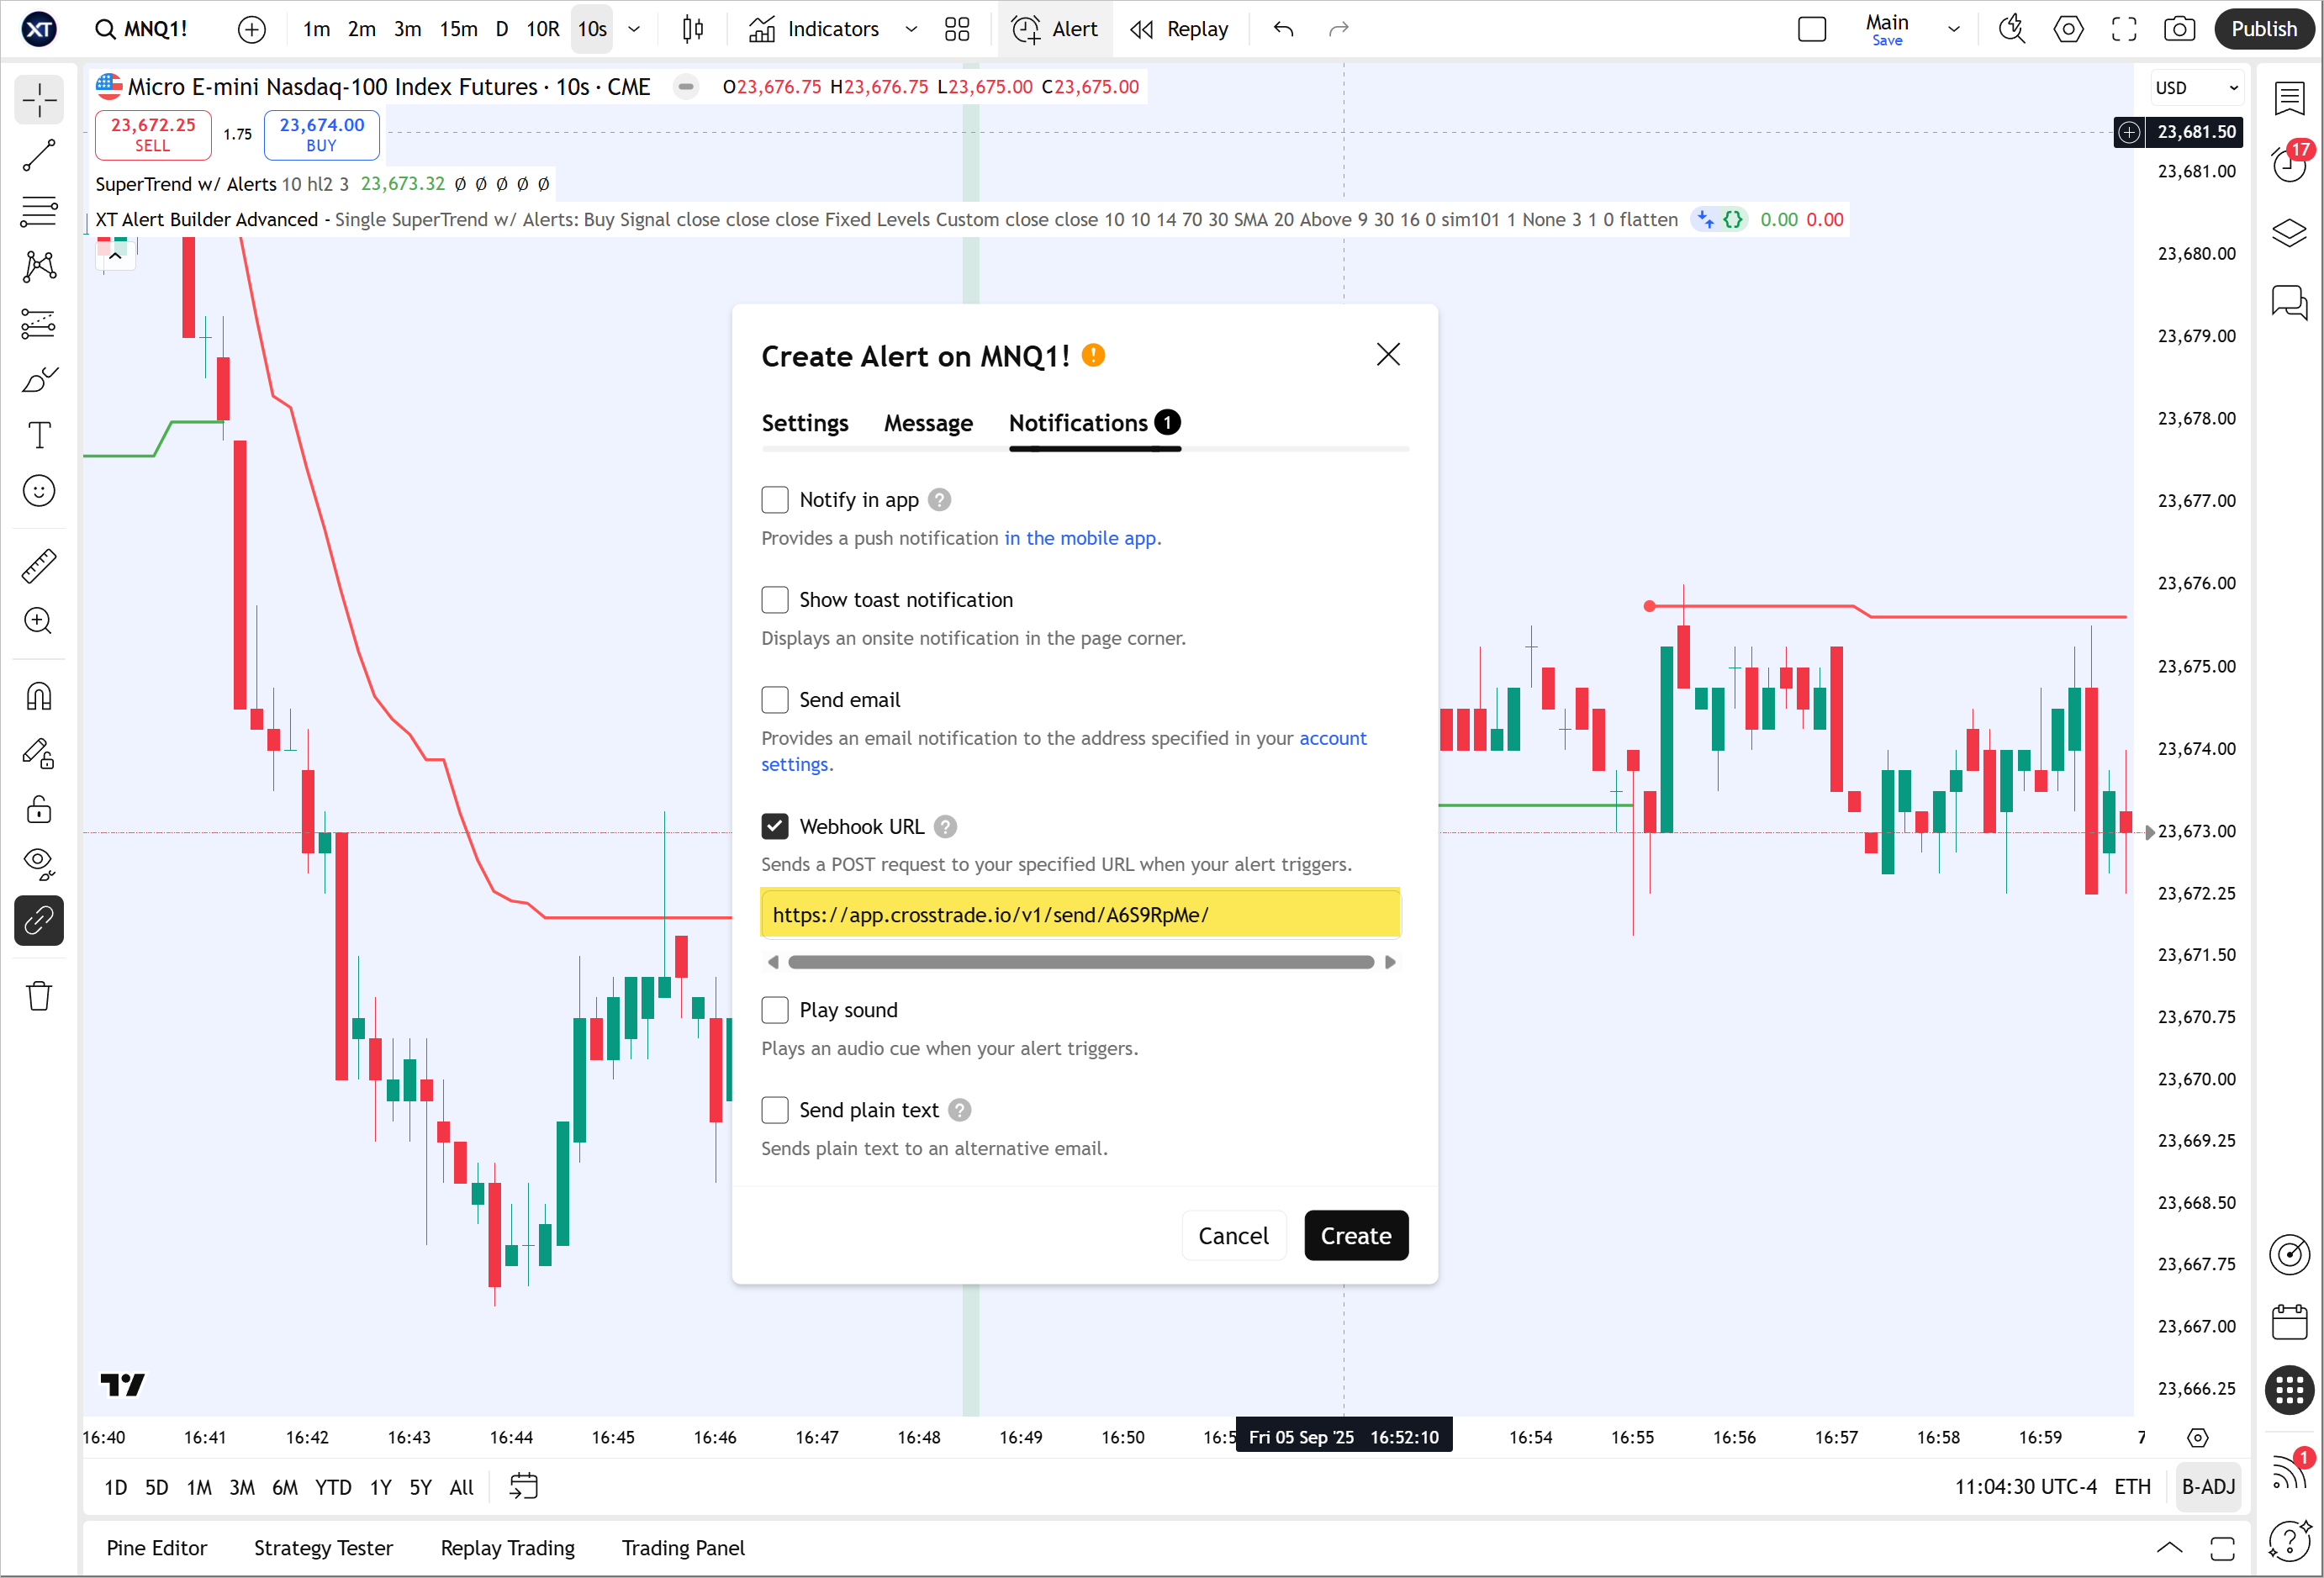
- Send alert message payload you want to execute on NinjaTrader 8. Here is an example of a basic buy market order for ES and a payload with dynamic variables for automating TradingView Strategies.
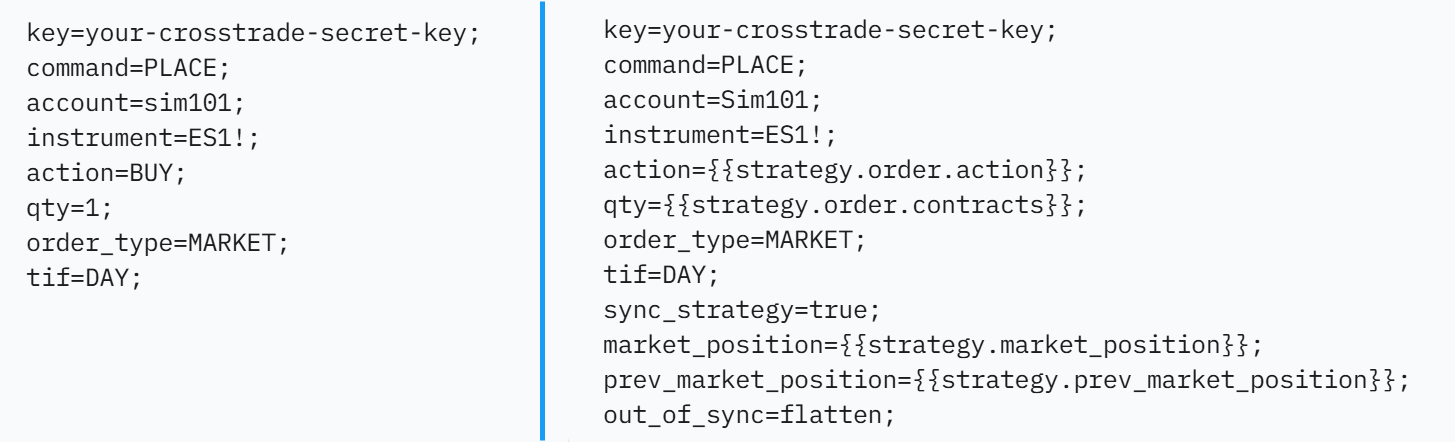
By learning the different command types within the NinjaTrader 8 framework and the CrossTrade specific enhancements that allow greater alert customization. Its now possible to fully automate almost any TradingView strategy or indicator to your Interactive Brokers account on NinjaTrader 8.
You now have a complete automated trading pipeline from TradingView analysis to IBKR execution. This setup eliminates manual order entry while maintaining full control over your trading strategy and risk management.
If you're using Charles Schwab as your broker instead of IBKR, see the Schwab Integration with NinjaTrader 8 guide.
For a deeper dive into building your webhook alert payloads, see How to Automate TradingView Strategies with CrossTrade. For the full command reference, see The Complete Guide to NinjaTrader Commands. And if you're managing multiple IBKR accounts, the Trade Copier can replicate trades across all of them from a single leader account.
